
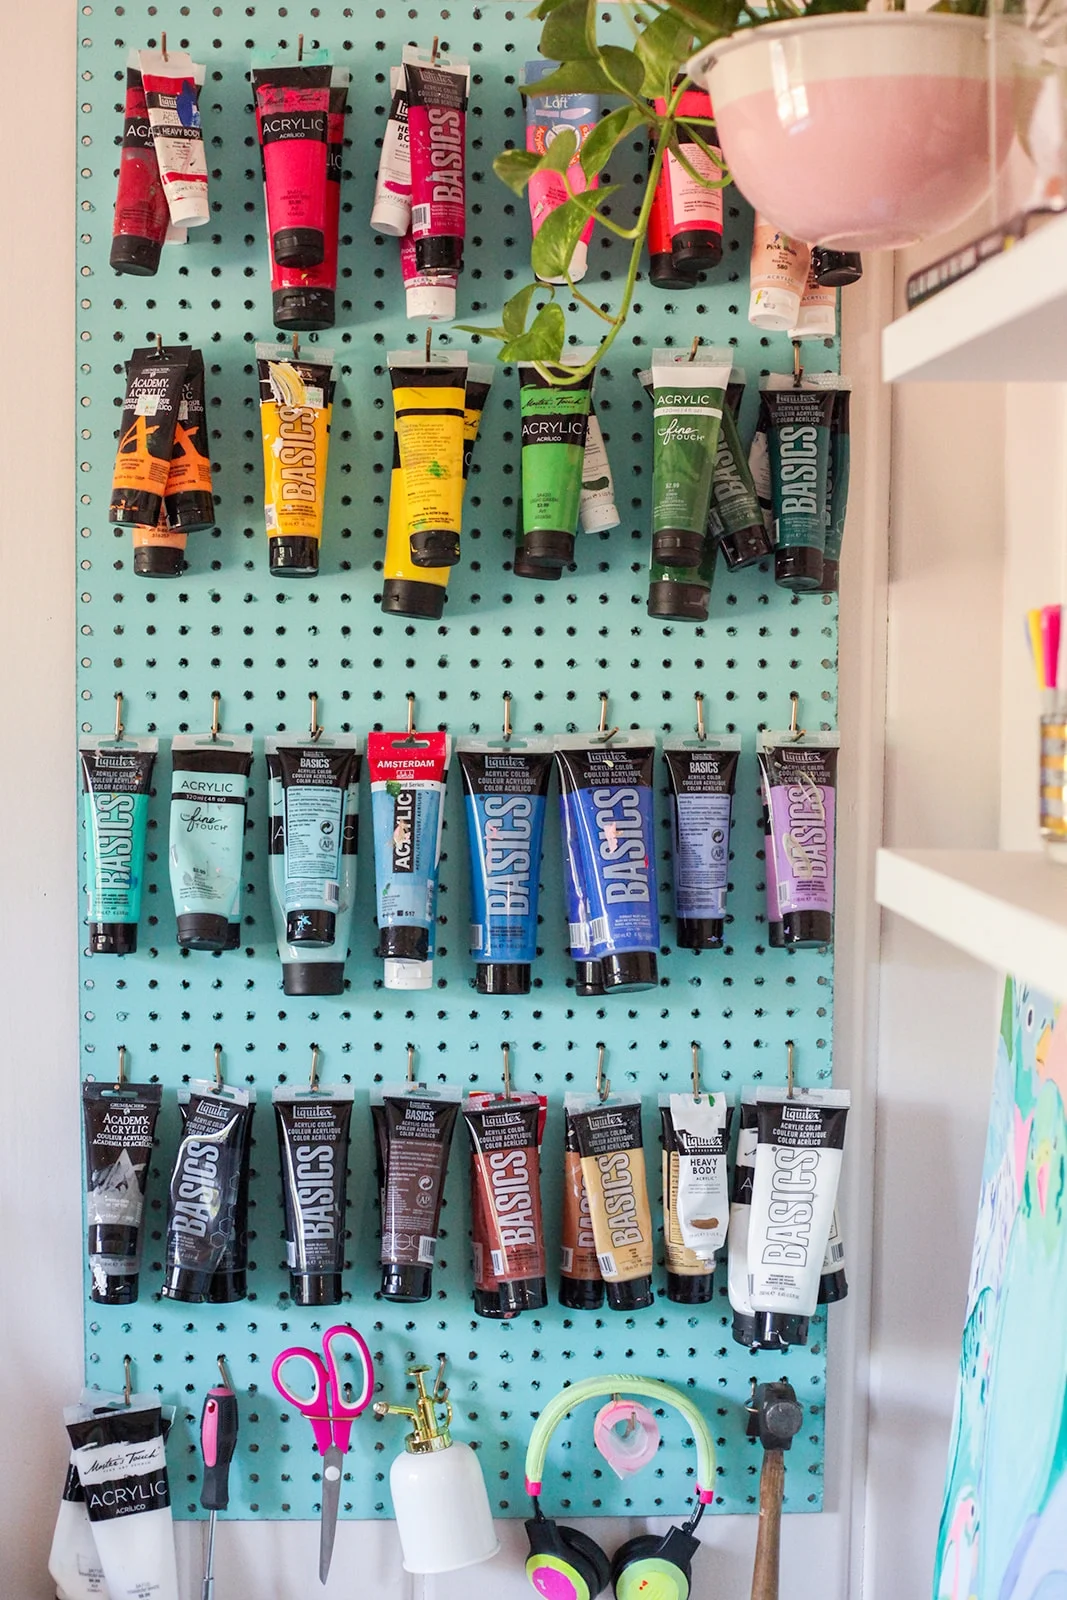
DIY: paint organization 🎨
At this point, it’s wildly clear that I’m here for a DIY project. But I always have 2 conditions: 1) it has to be outstandingly easy and 2) it needs to look polished as a final product. Nothing to craftsy is permitted! (What’s to craftsy? I don’t know. It’s wildly subjective!)
In March, I hired an organizer for my studio. (See last post!) Orchid Organizing’s Owner, Kate, sent me to Lowe’s with a short list: peg board and hooks. I knew where she was going with it, so I got those two items, but I added two more. I found the best shade of bright spray paint I could find in a strangely small section (aqua, although I really wanted a light pink!), and a bronze-gold spray for metal. Lowe’s has precut peg board in really manageable sheets, so I purchased one (for less that $10 I might add) and a few varied hooks that i knew would work for paint tubes.
The DIY part of this is almost too easy to be called a project. I laid all of the hooks out in a shallow box and sprayed them gold; dried it for an hour, flipped, and repeated. Then I let them dry for 24 hours before using them. At the same time, I sprayed the front of the pegboard (the front is just the best looking side) until it was fully coated and smooth- about three full coats for me. One can of each color did it! Same rule though- I let it dry 24 hours before use.

To hang, we placed three large nails in the wall to match to holes on the right, left, and middle of the peg board. We hung it up, and the magic unfolded! *note: I have real pine paneling in my studio, so the nails were held in place very well and could support the weight of the board with paint. Try to find a stud if you have drywall, or use an anchor and screws!
I also have tubs of paint, so we hung shelving for it. This peg board is a major part of keeping things organized now, though! I can’t believe I didnt think of it before. Go make one, artists! You won’t regret it.


STUDIO TOUR! (and why hiring an organizer is a GREAT idea)
**Since I wrote this, Orchid Organizing has become Kate Waldo and Co. Same person, same great organizing, new name!
Welcome to what will probably be my favorite post of the year!
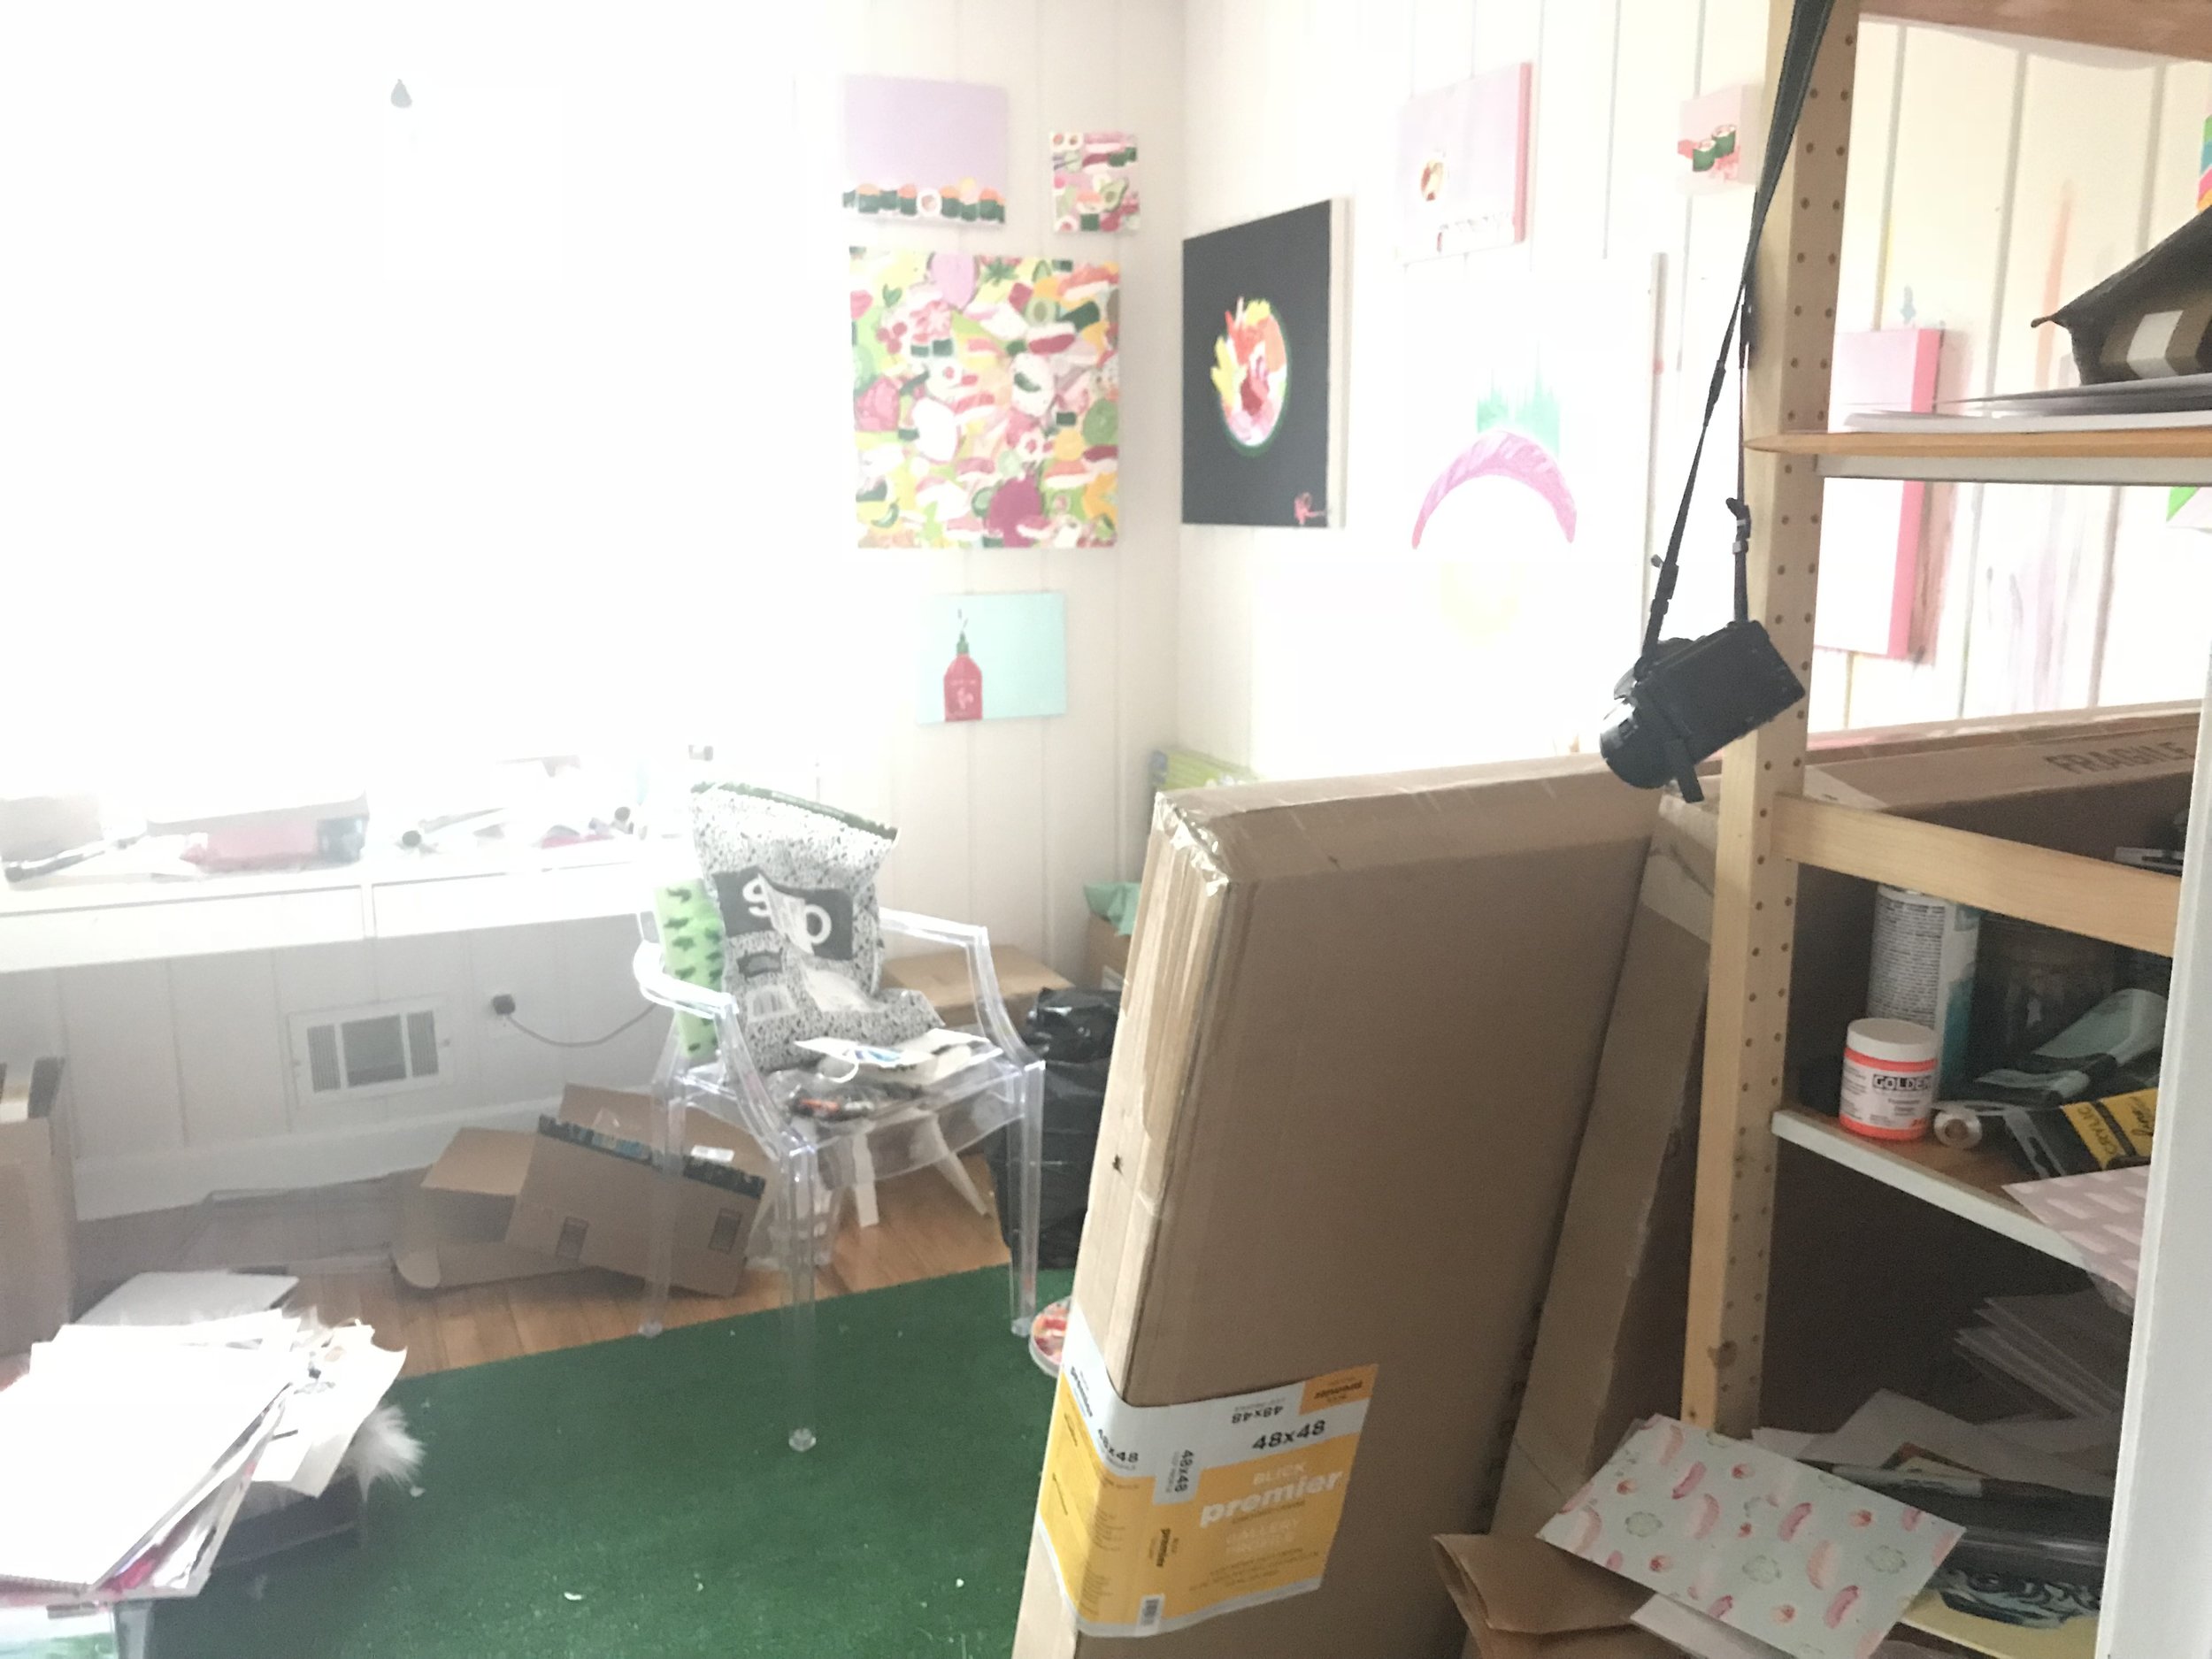
This one is- let me warn you- a real peek into my worst nightmare. (aka what my studio used to look like) Then, it ends with my dream! (which is a gorgeous new studio that actually makes sense!) Also brace yourselves-- this post is long one. But it's my blog, so it can be!
Let's start at the beginning: I work from home. In each apartment or house I've lived in, There's always been a second or third bedroom that I've used as my office. I've never been thrilled with the offices I've had- mostly because they felt a little cluttered and messy *at all times*. Last February, we moved into our new house (the first one where we weren't renting!) the week before our wedding. What the heck was I thinking! But I'm still glad we did it. It was so nice to host our out of town friends in our new home, even though it was an insane amount of work getting it all put together right before the wedding.
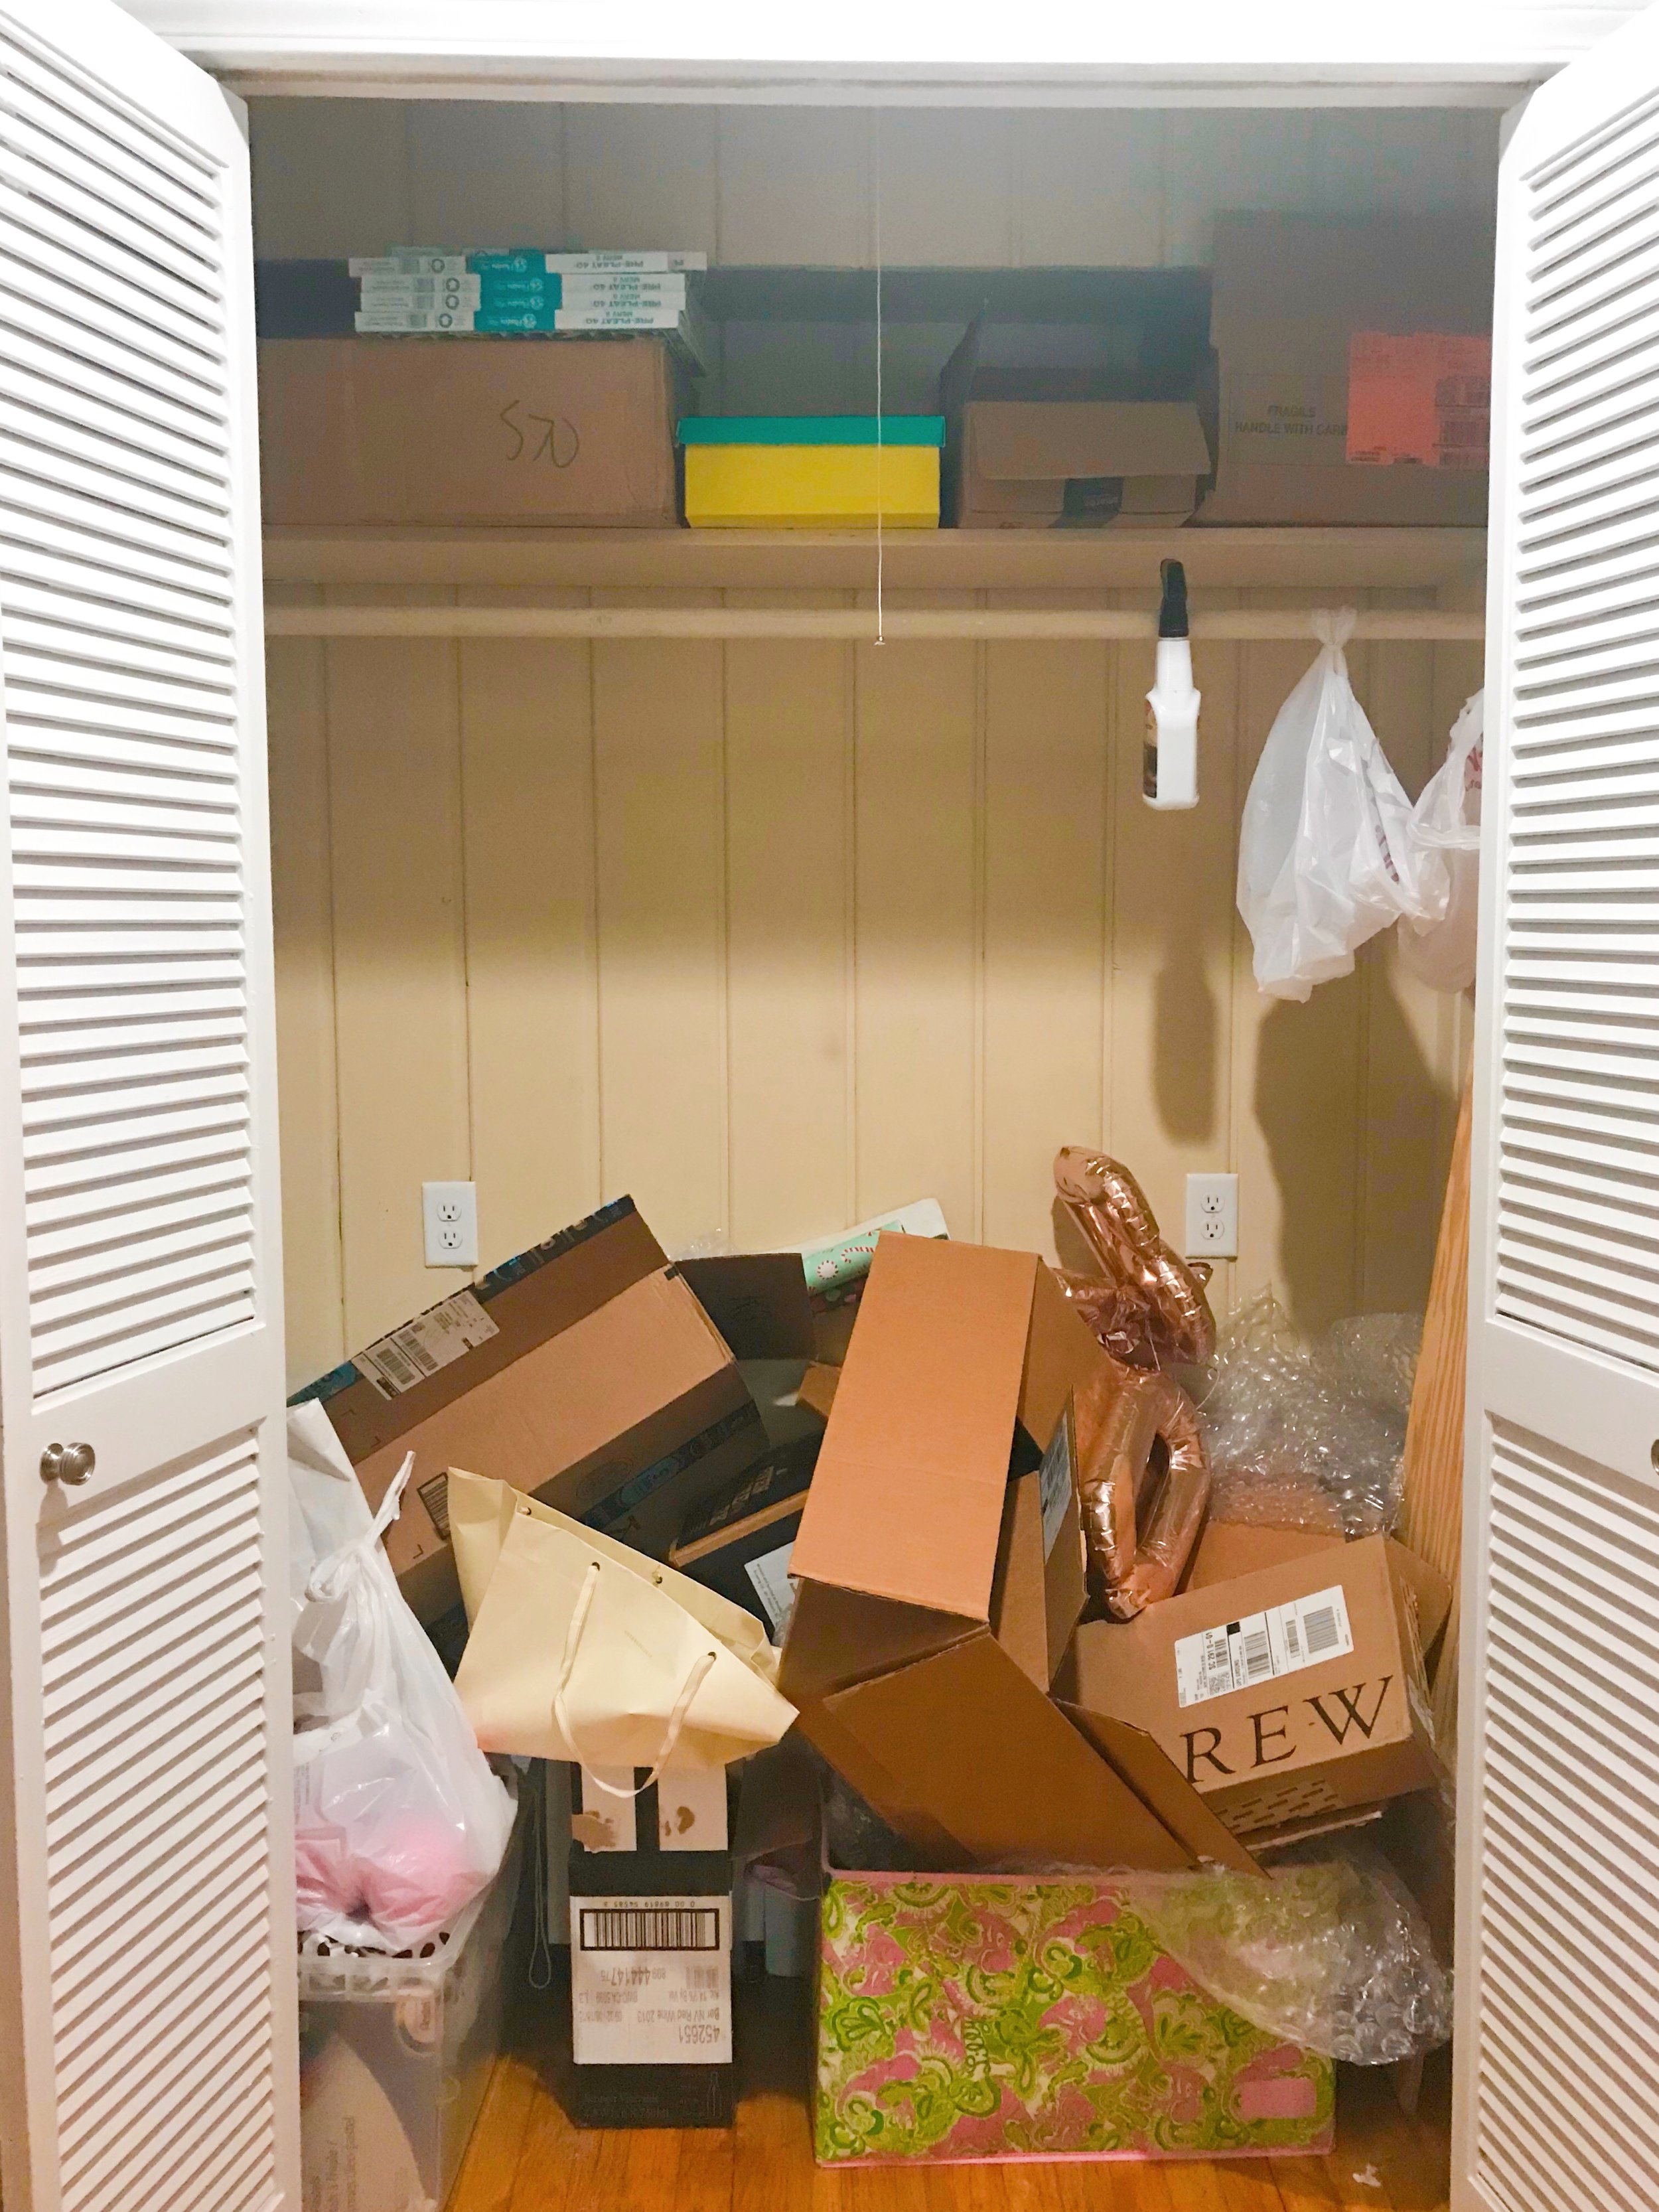
All of that said, my studio and corresponding hall closets ended up being the place where the "i don't know where this should go but it can't go here" stuff ended up during the move, and then during every important visit or cleaning session after. On top of that, I never actually sat down and took the time to think about what I wanted the room to look like and how I could make it more functional and "Megan Carn" instead of just being the room I use to paint.
At the end of February, the situation was at a critical point. This year has been my busiest yet (yay!) but the room showed it. It was stressful, STRESSFUL to say the least- other words I would use are overwhelming, yikes, disaster, mess, horror... I could go on. I would spend a few hours "cleaning" but then within a week it was back like it was before I cleaned. I was working at our kitchen table instead of going in my studio when I could, and I was literally avoiding going in because I couldn't even imagine having the time to clean it again.
By some miracle, Orchid Organizing appeared in my Instagram feed. I think someone I follow mentioned it, and I followed immediately. (and 10 minutes later, I was on the phone with Kate!) I loved her personality and website and before I knew it, she was scheduled to come the next week to help me whip my studio into shape. Obviously when you see the photos, you'll want to immediately call her. Just in case you don't immediately want to call her, or any organizer, here are some reasons you should:
1) She had a plan, and she saw things I never would have even thought of for the space. (ex: see closet picture.)
2) She took a full carload of donate/throw away stuff with her. I didn't have to find a place to take it OR take it myself.
3) Let's pretend I could have imagined the things we changed (I couldn't have)- it would have taken me a full week to do it on my own. We wrapped this thing up in 6 hours! (6!?) And then, it was done. Forever! Kate is a machine.
4) She gave me a brief list of things to get before she came, and even offered to pick them up for me. But overall, she was here to work with what I had, and I am on a budget, so that is great.
5) My mind is at peace. I can see where things are, I'm not constantly looking for things, and I can walk in and breathe again.
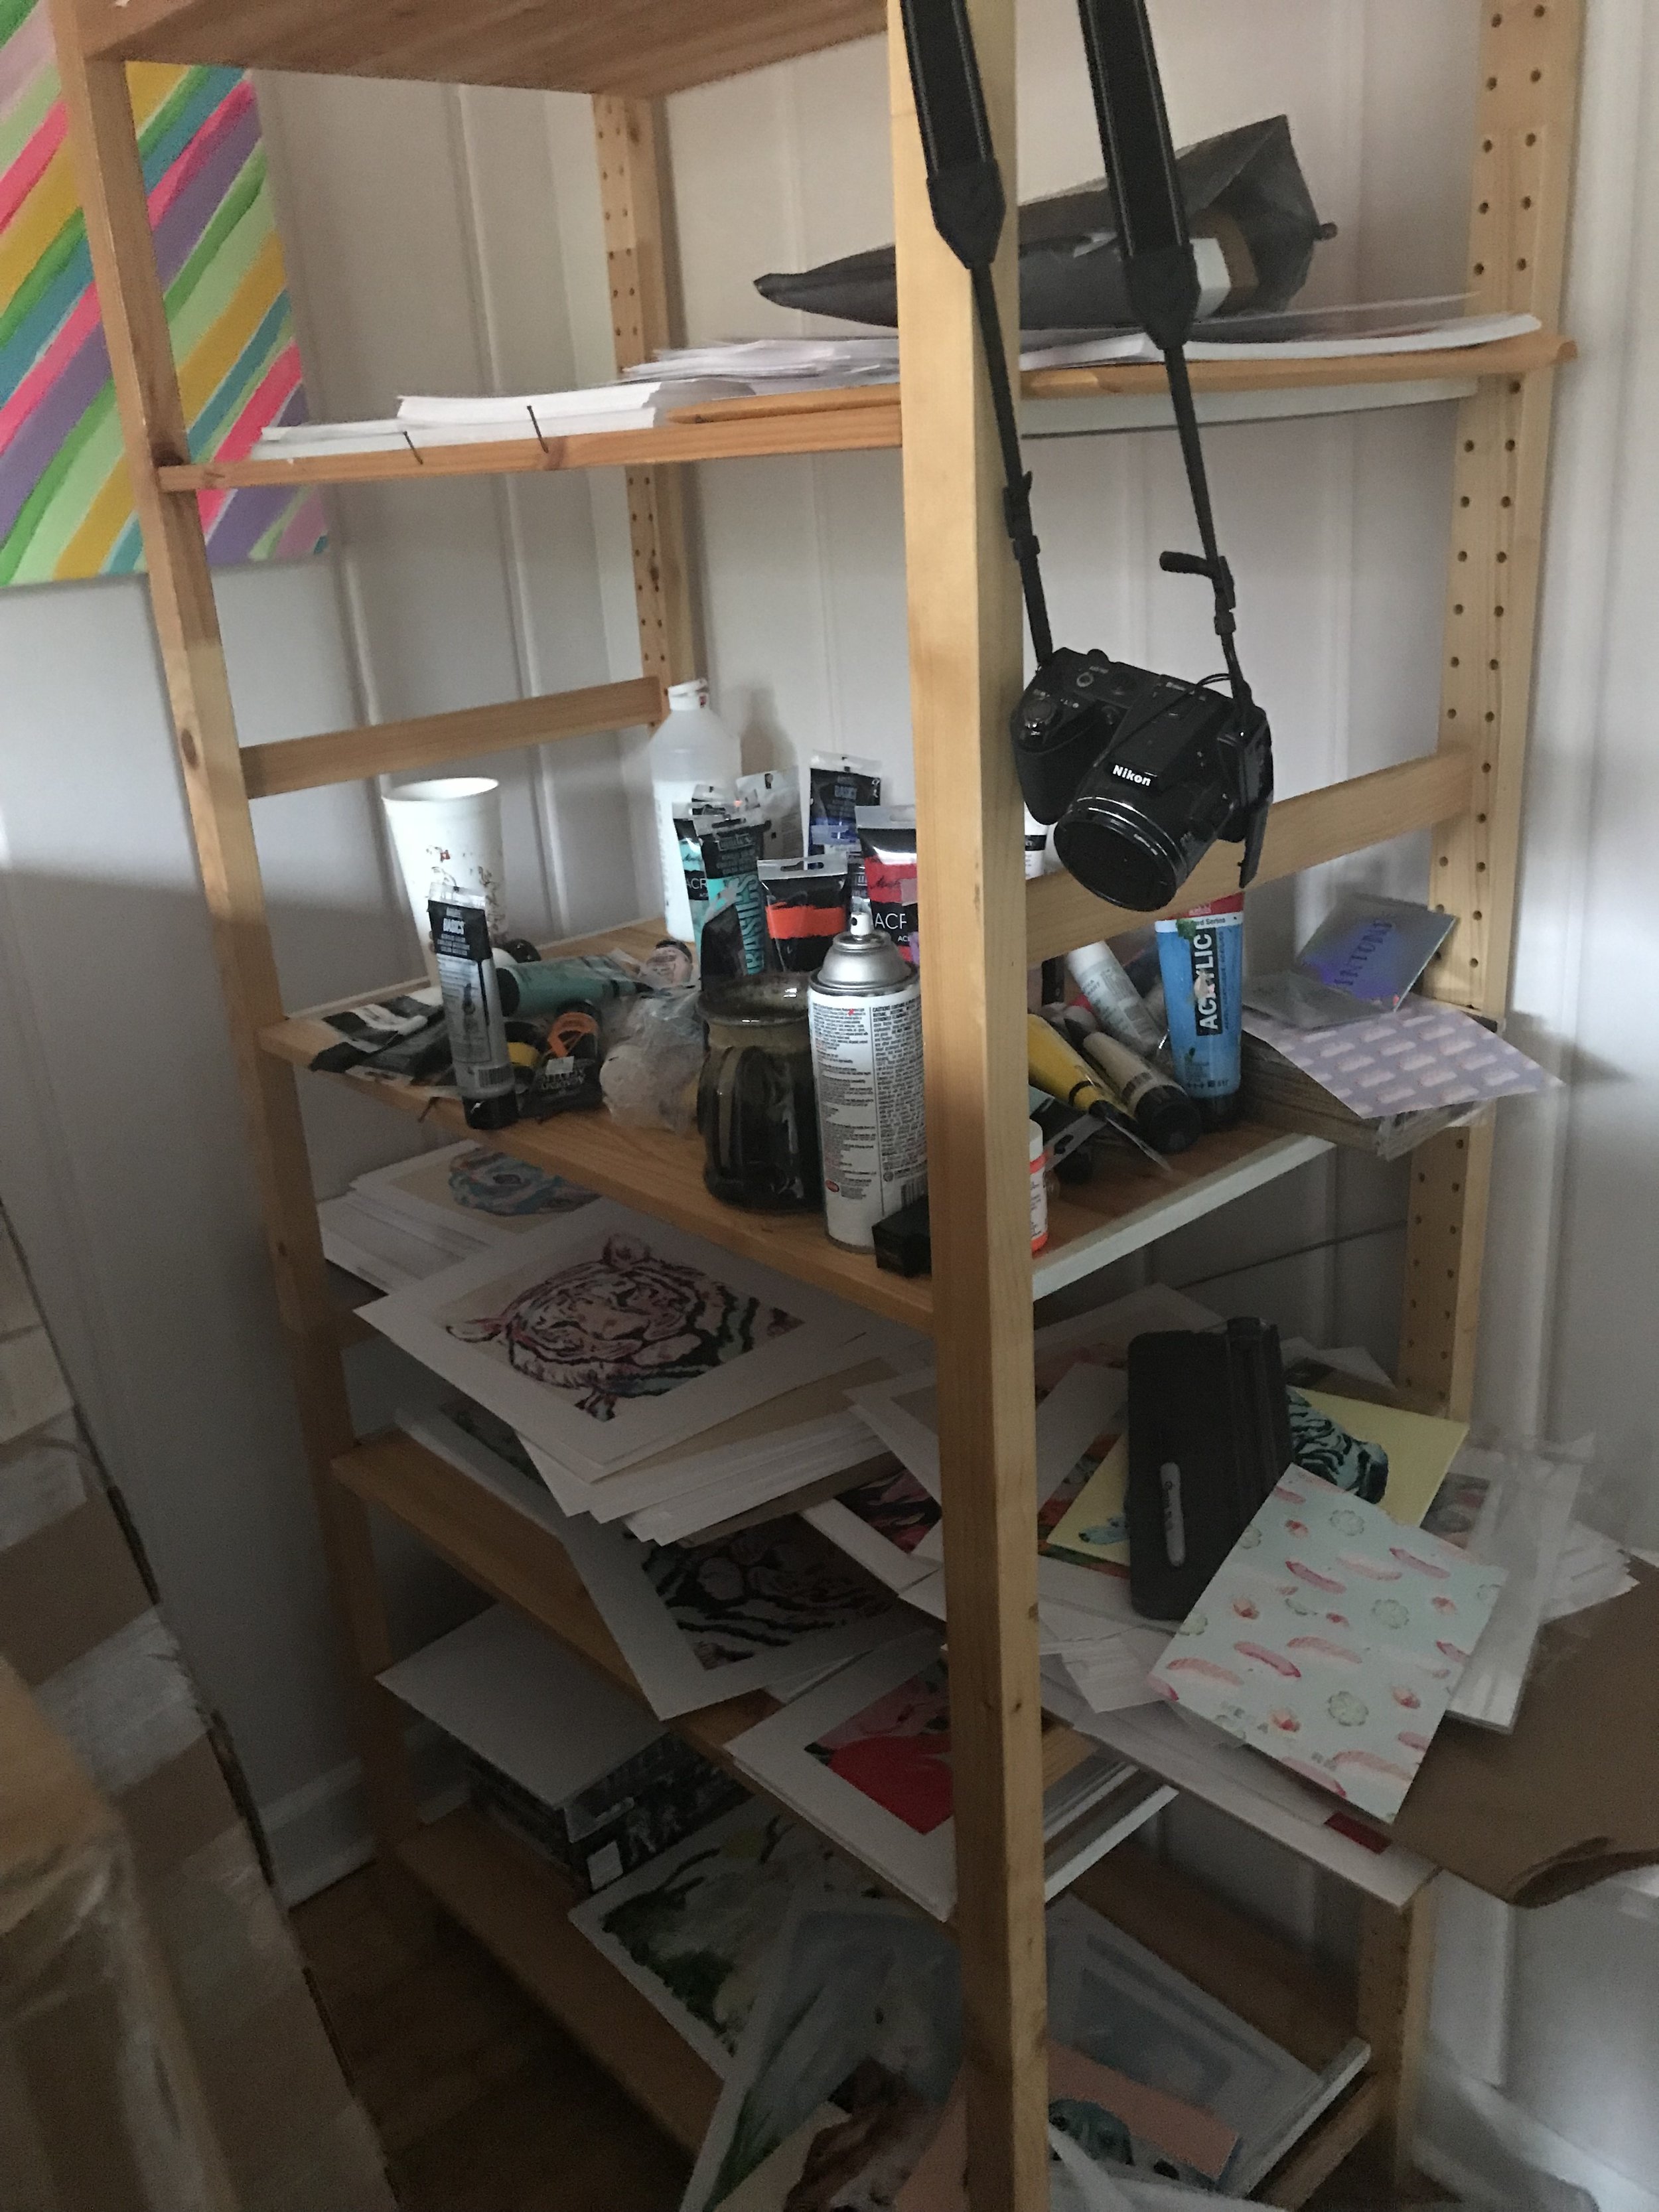
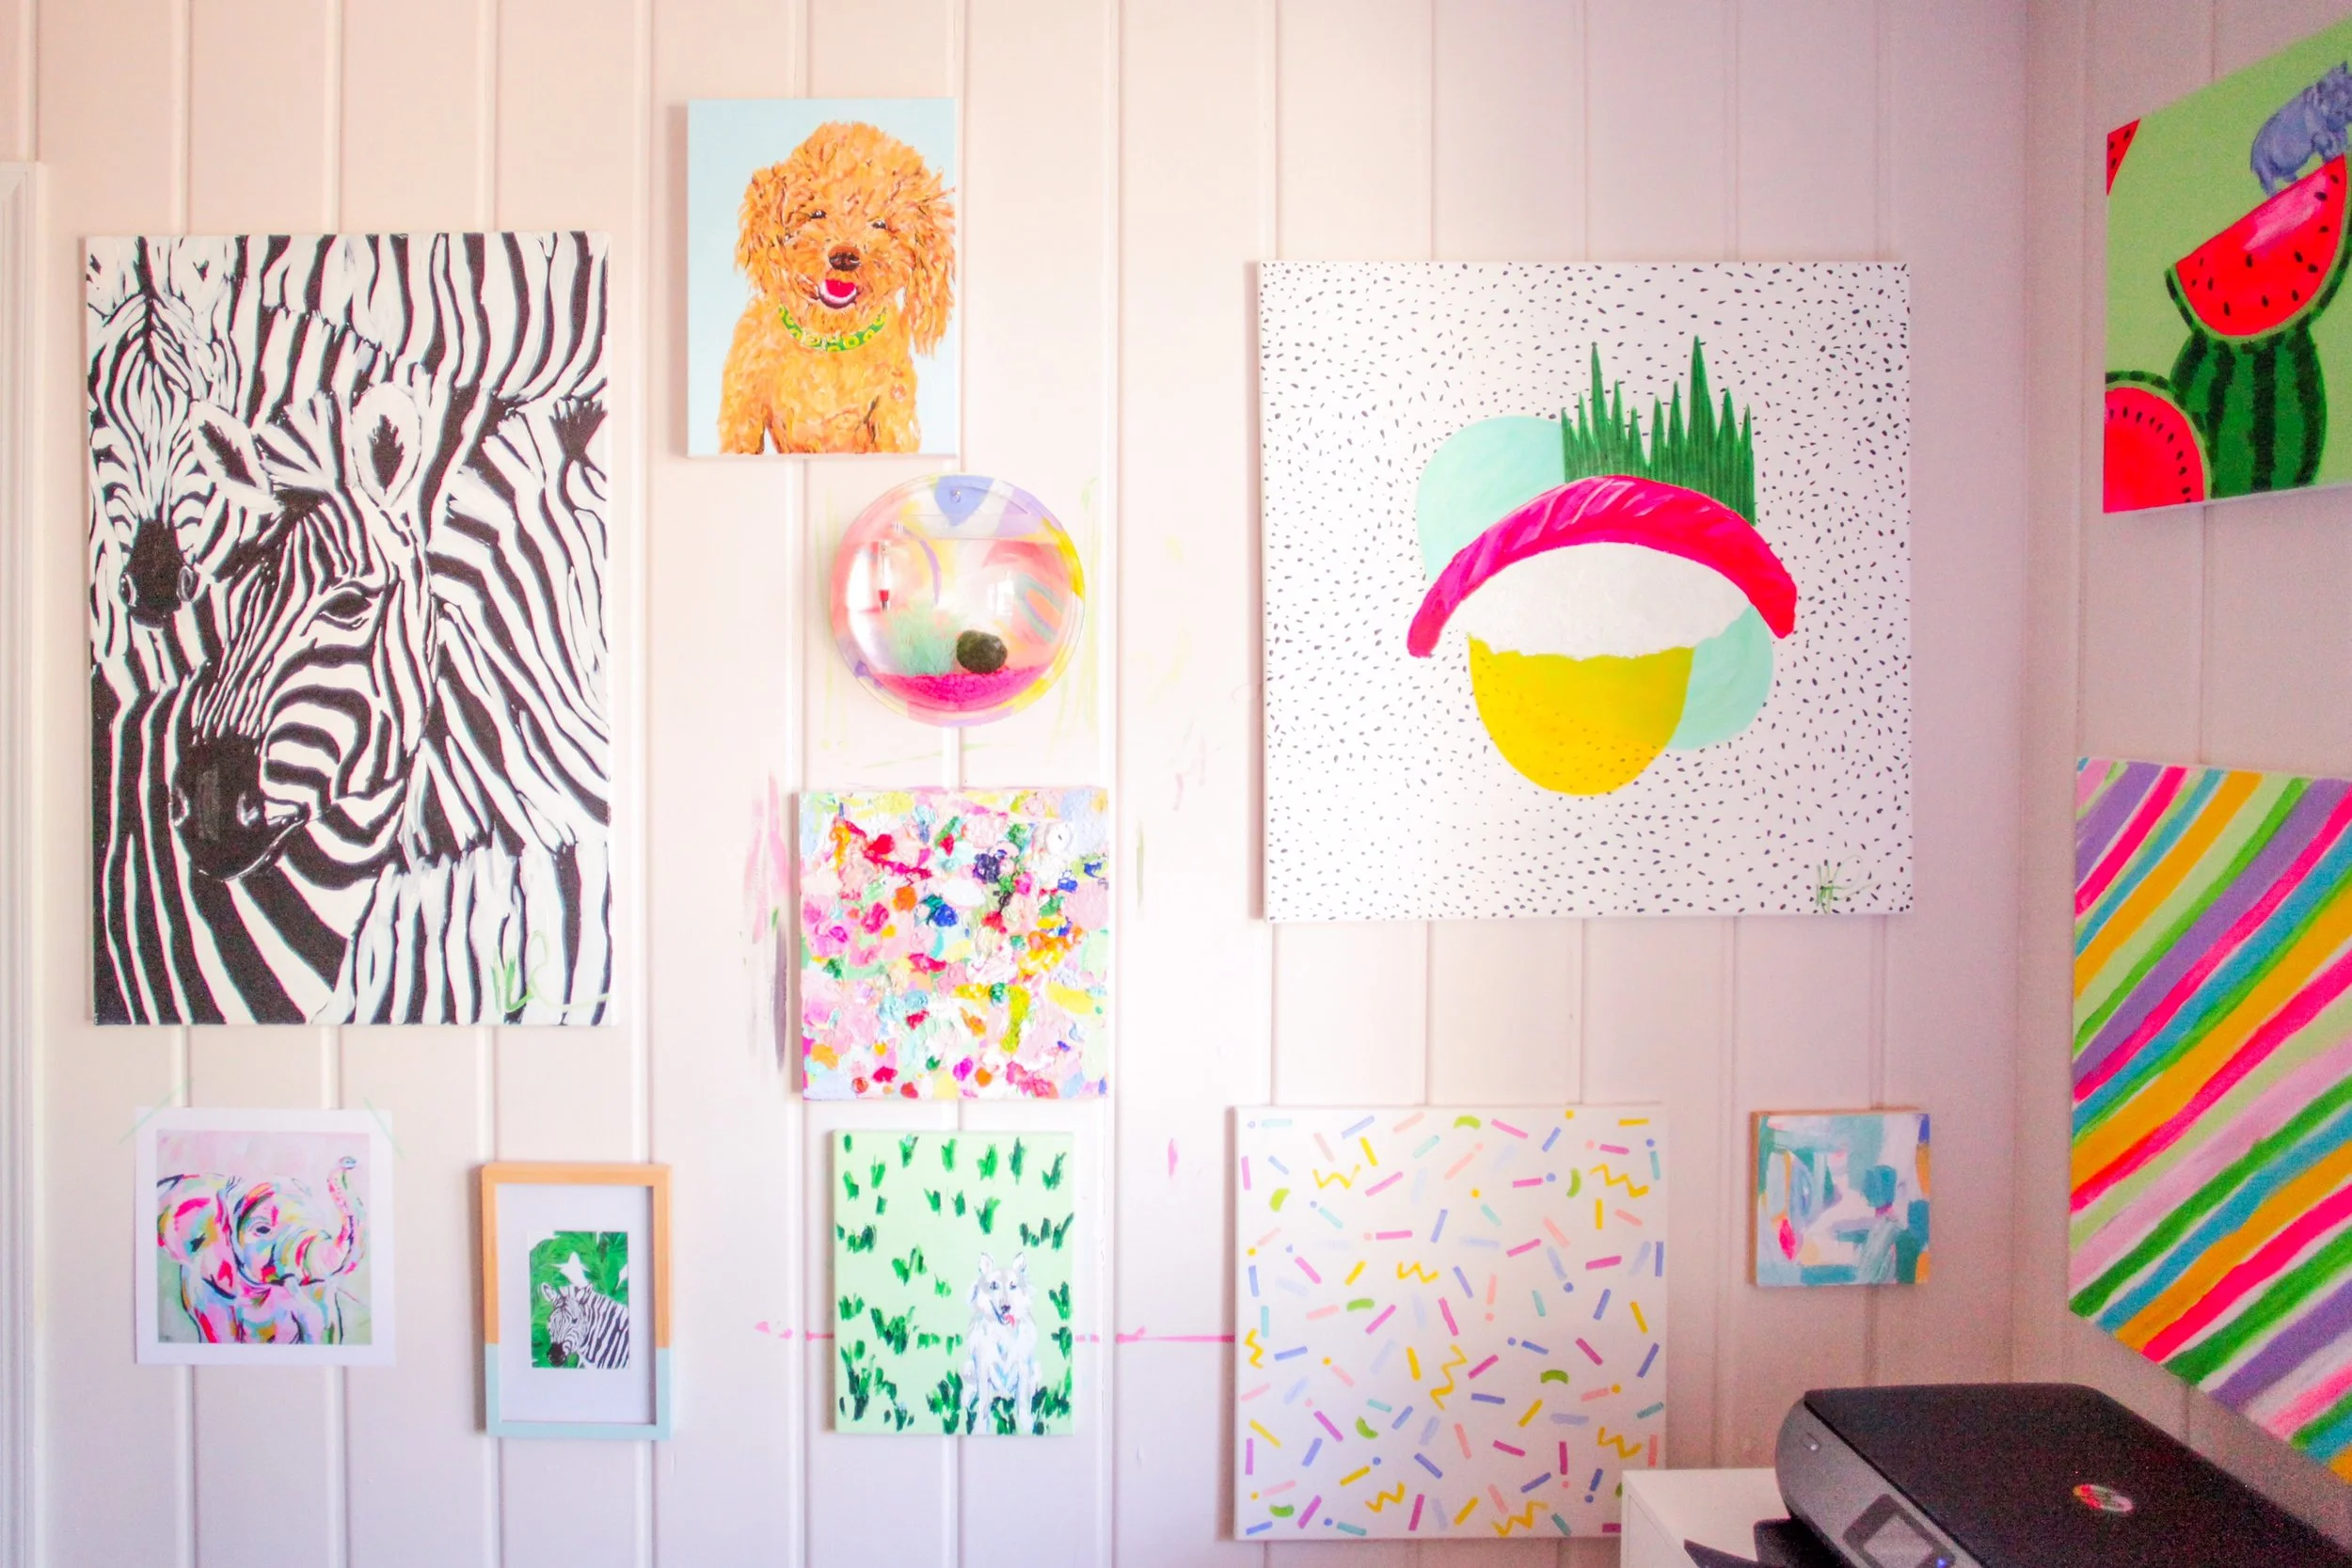
So finally, here we are- before and after photos. Disclaimer: these before photos are not staged. They were taken 4 days before the organizing occurred, and they are a true representation of where we really were when we started. Again, yikes.
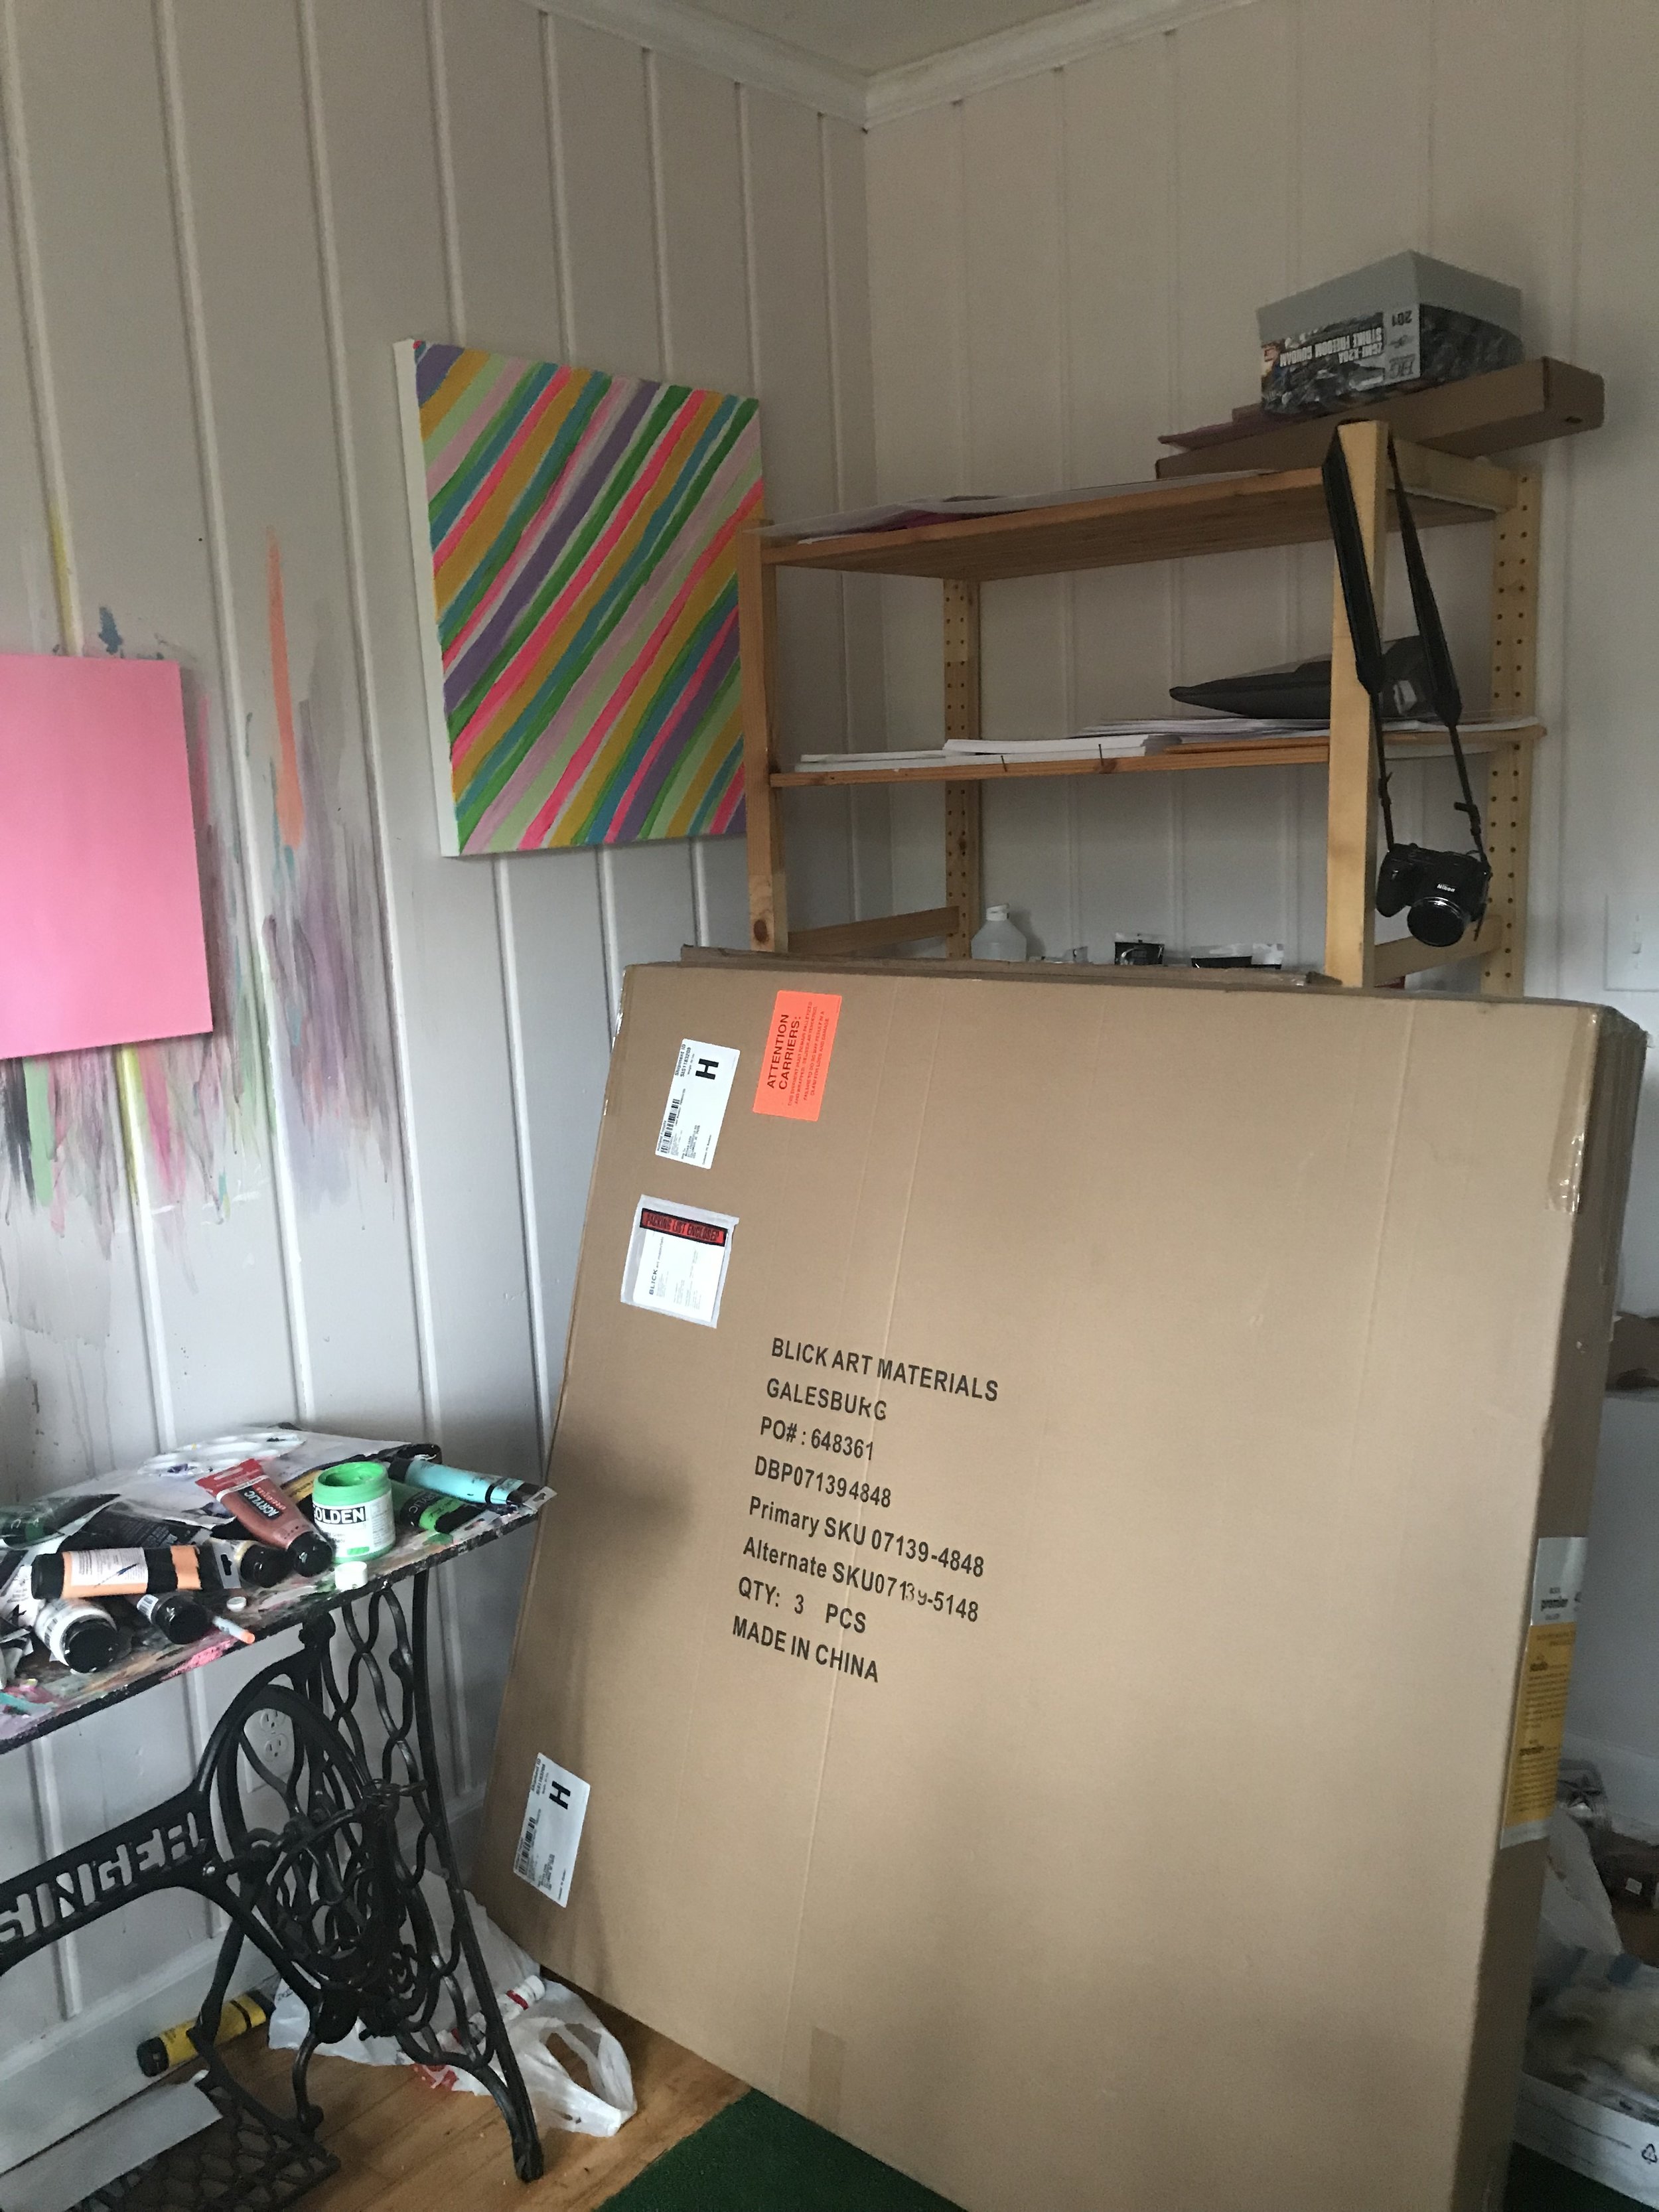
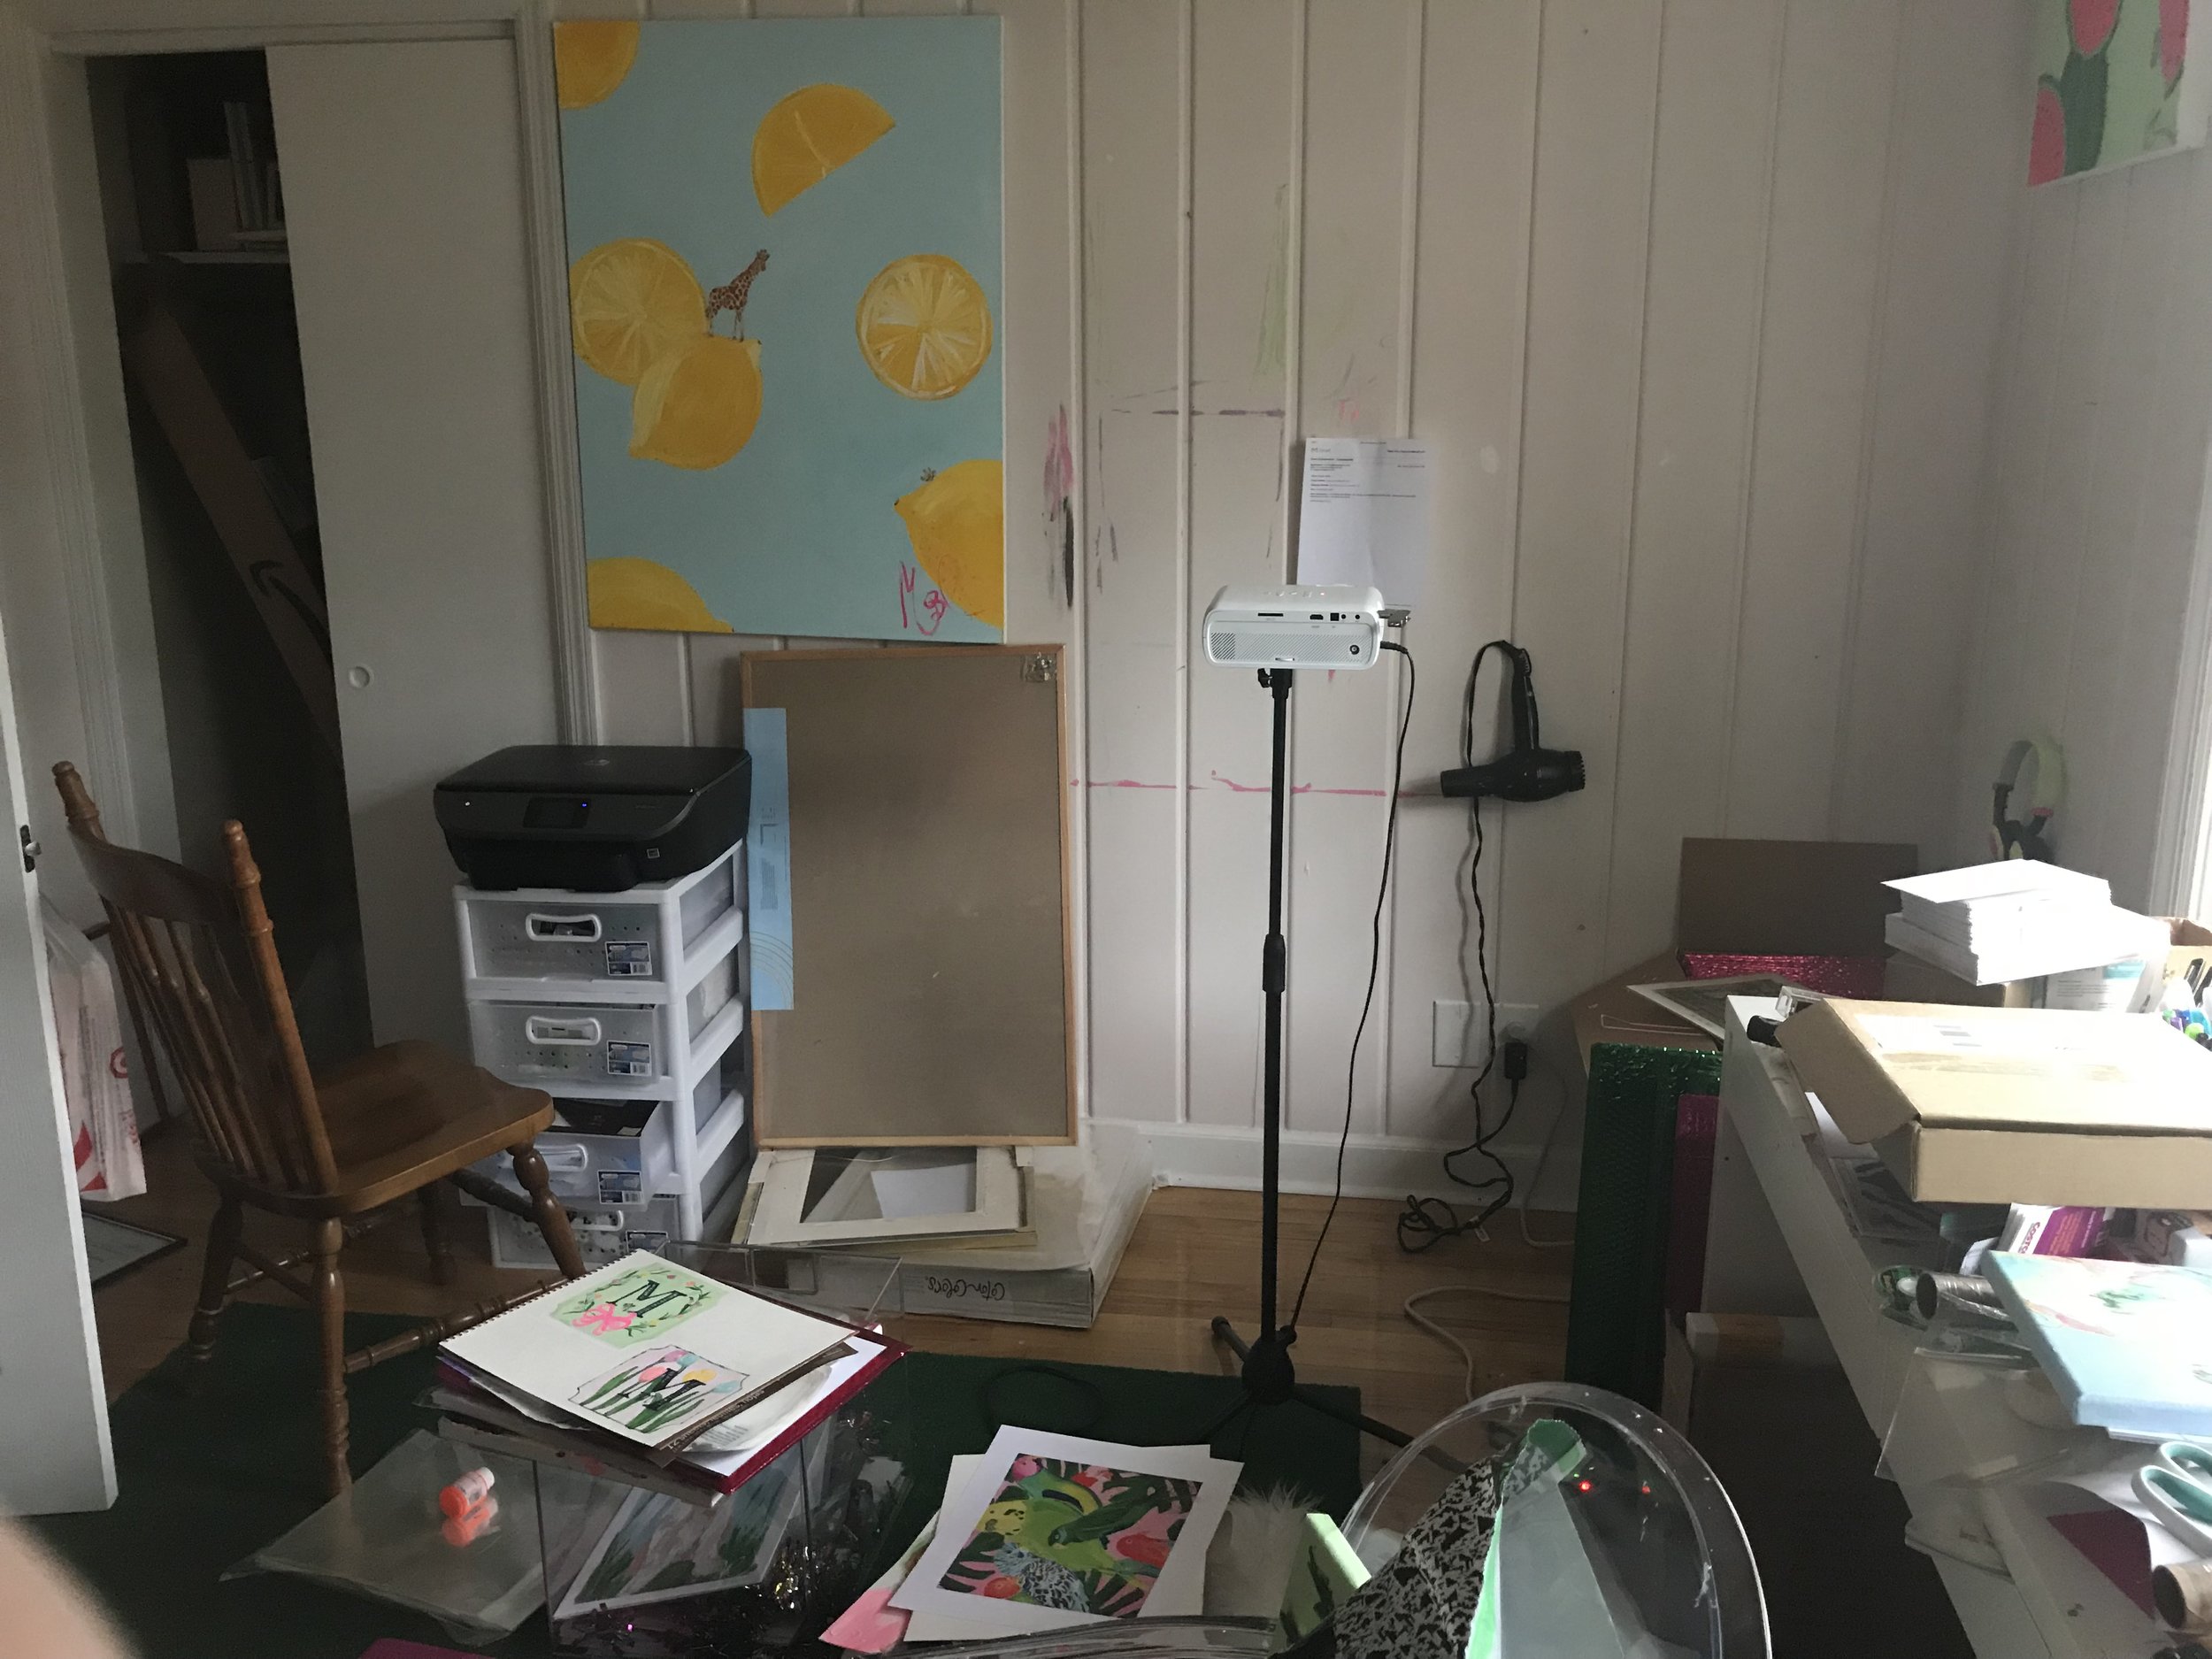
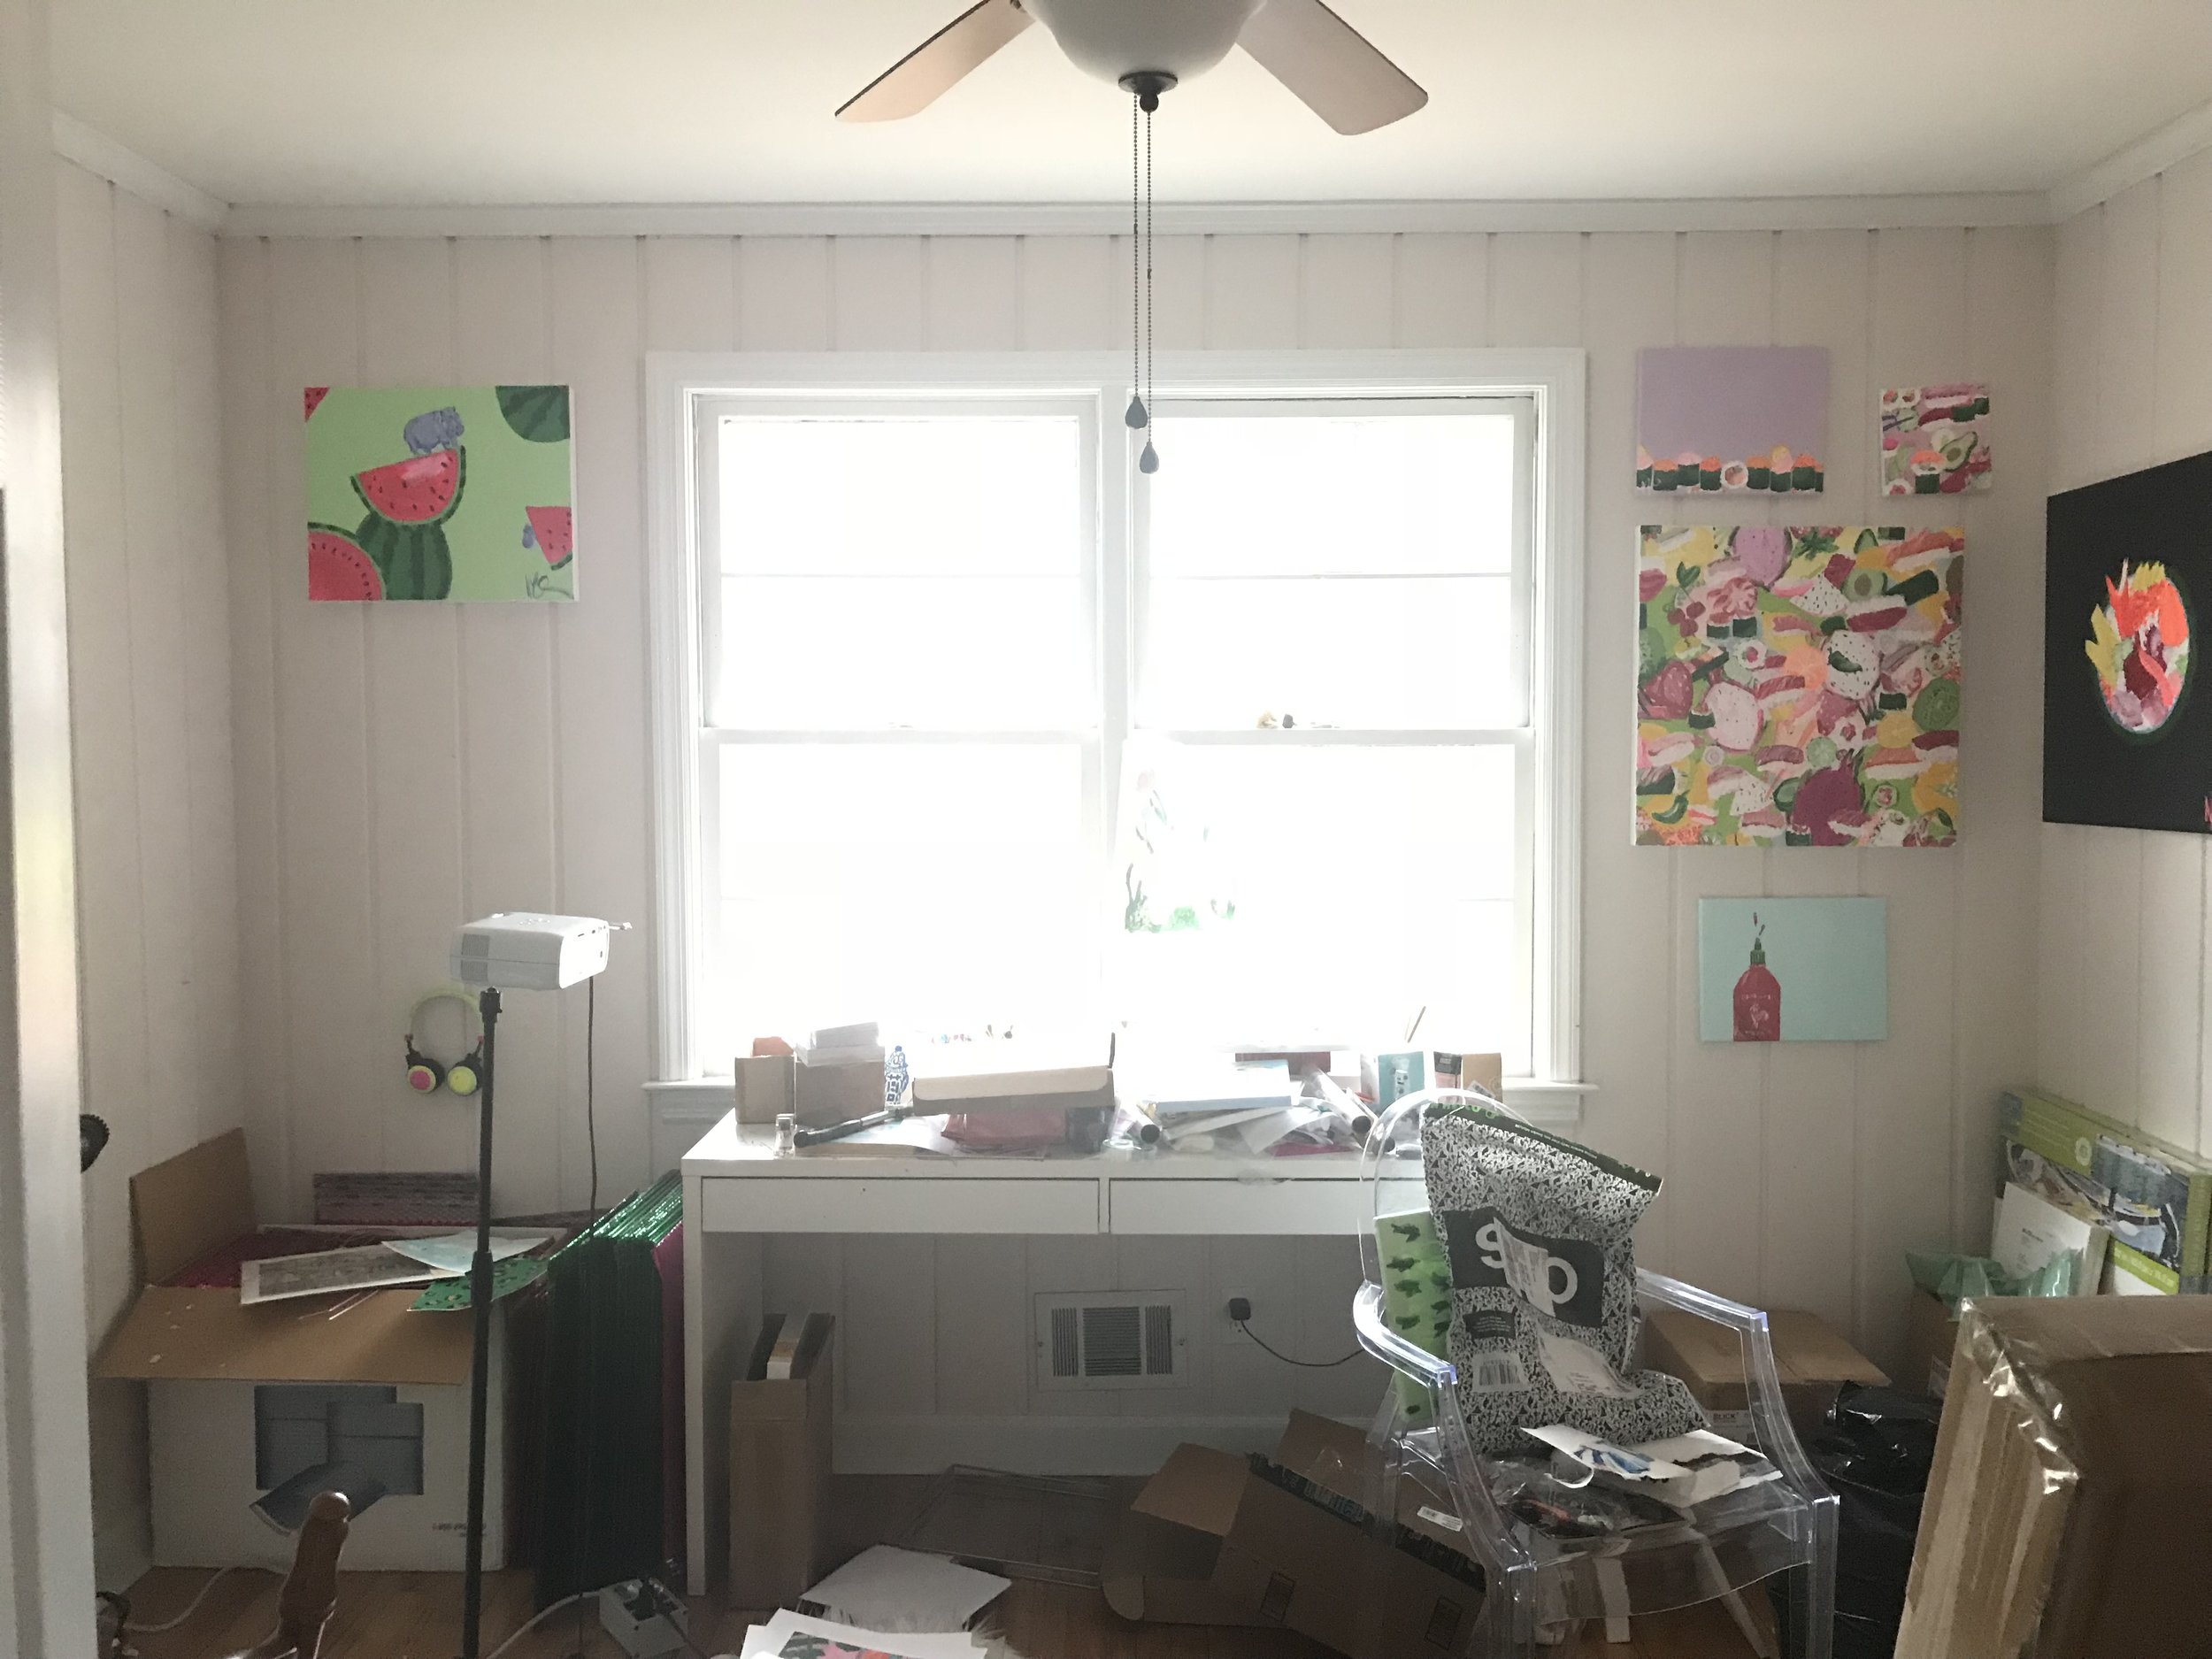

There they are! In all their glory. But now, it's time for the afters:
Photos by my new friend and photographer, Mac Jones.

WHHHAAAAAT!? (debating with myself about what to do with this ceiling fan. paint it? replace it? leave it?)

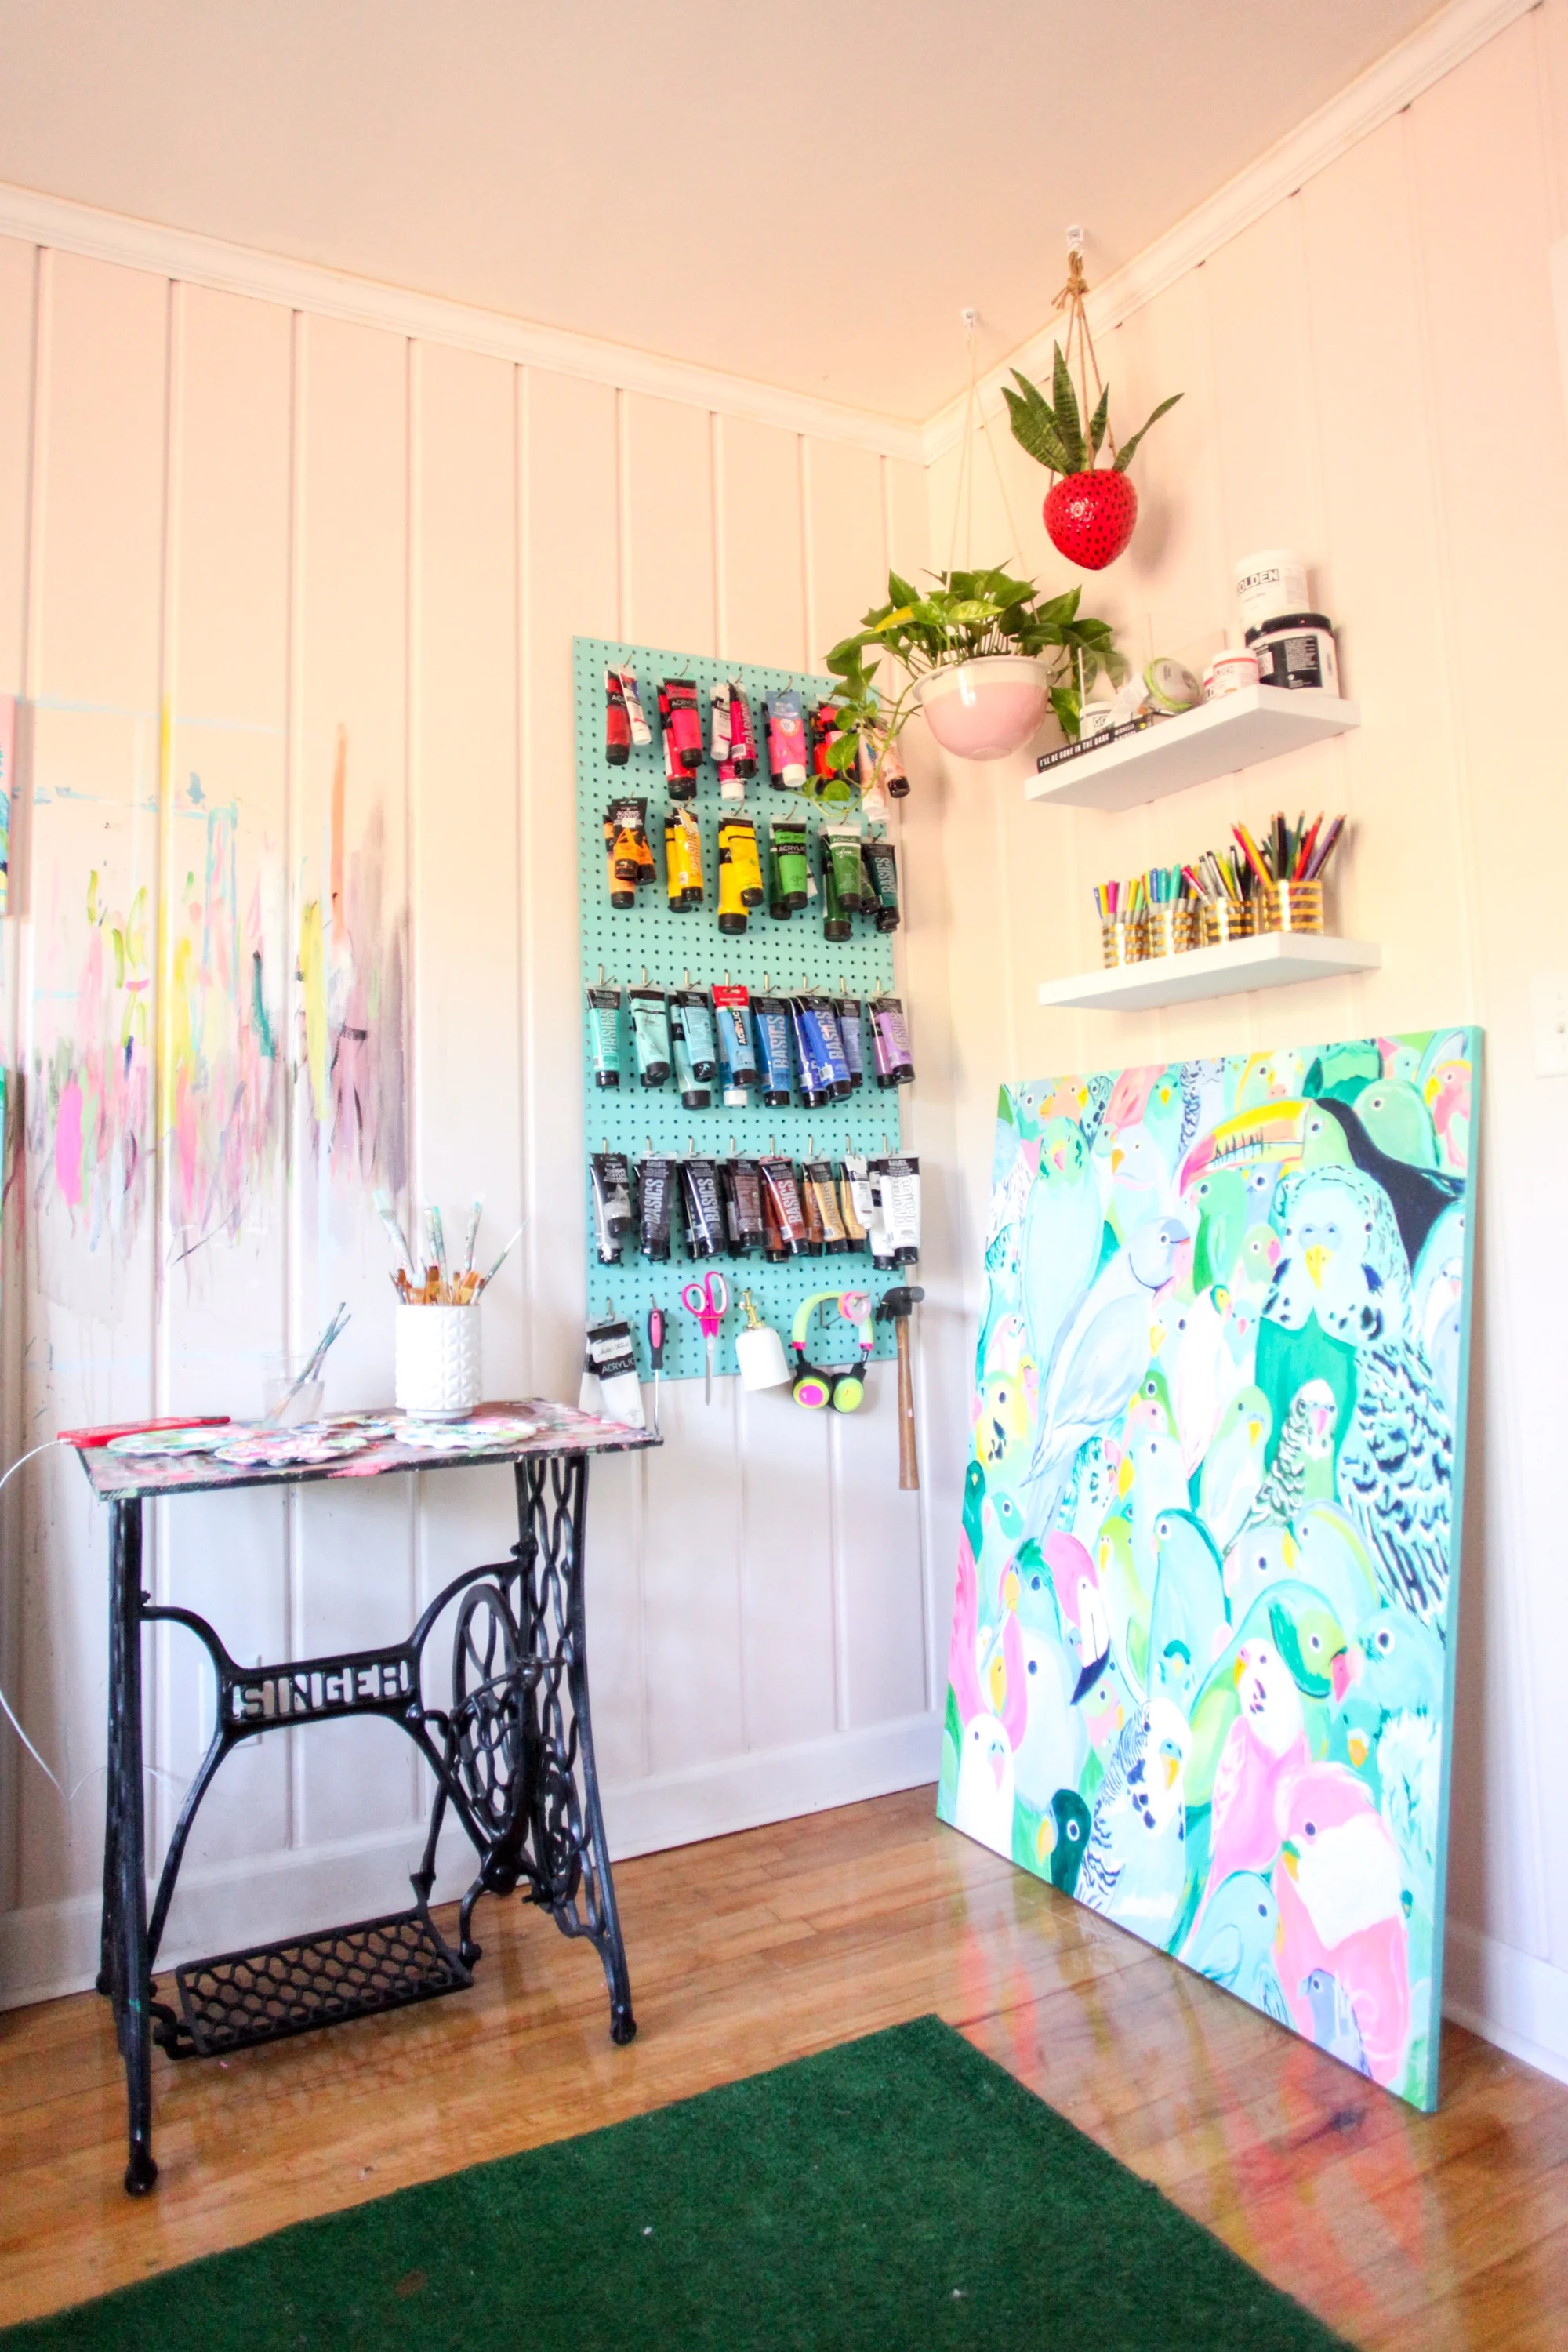
Can you believe it? The shelf is in the closet. So much better.
Pegboard DIY coming soon!

I am finally a plant lady! I've gotten this question in the past- my antique Singer base was my grandmother's, and I use it to paint. It's been a fixture in every studio since I started painting full-time. Pink planter // Strawberry Planter

These drawers from IKEA came in clutch for storing the 20- some odd prints I carry. And, I don't mind how they look! I'll be adding some new legs soon instead of the black casters.

Effie is THRILLED with the changes, and she now has an area to lay while I work. My dreams of a studio dog are finally coming true!

In a great move, we decided to take the closet doors off. I am so glad! Look at this! I have canvas storage, kept my little drawers, and I have all of my other supplies in here too.

Scotch and friends...

Stationery organizers, clutch.


Hey, Scotch! (TANK DIY)

I saw this pillow and absolutely had to have it. It's large and for the size, a great price! Shop it here: Kailo Chic


Well, that is that! My studio is finally livable. It's amazing how much easier it is to work and keep it tidy now that everything actually has a home. I've been working in here almost every day for over 6 months and it still looks (almost) like this! I can hardly believe it.
Weigh in on the ceiling fan issue below! Also, call Kate Jones @ Orchid Organizing, seriously. It changed this space and everything I do in it. I love it.
Here's one more great photo for the road of my studio dog and me:

DOGS DOGS DOGS
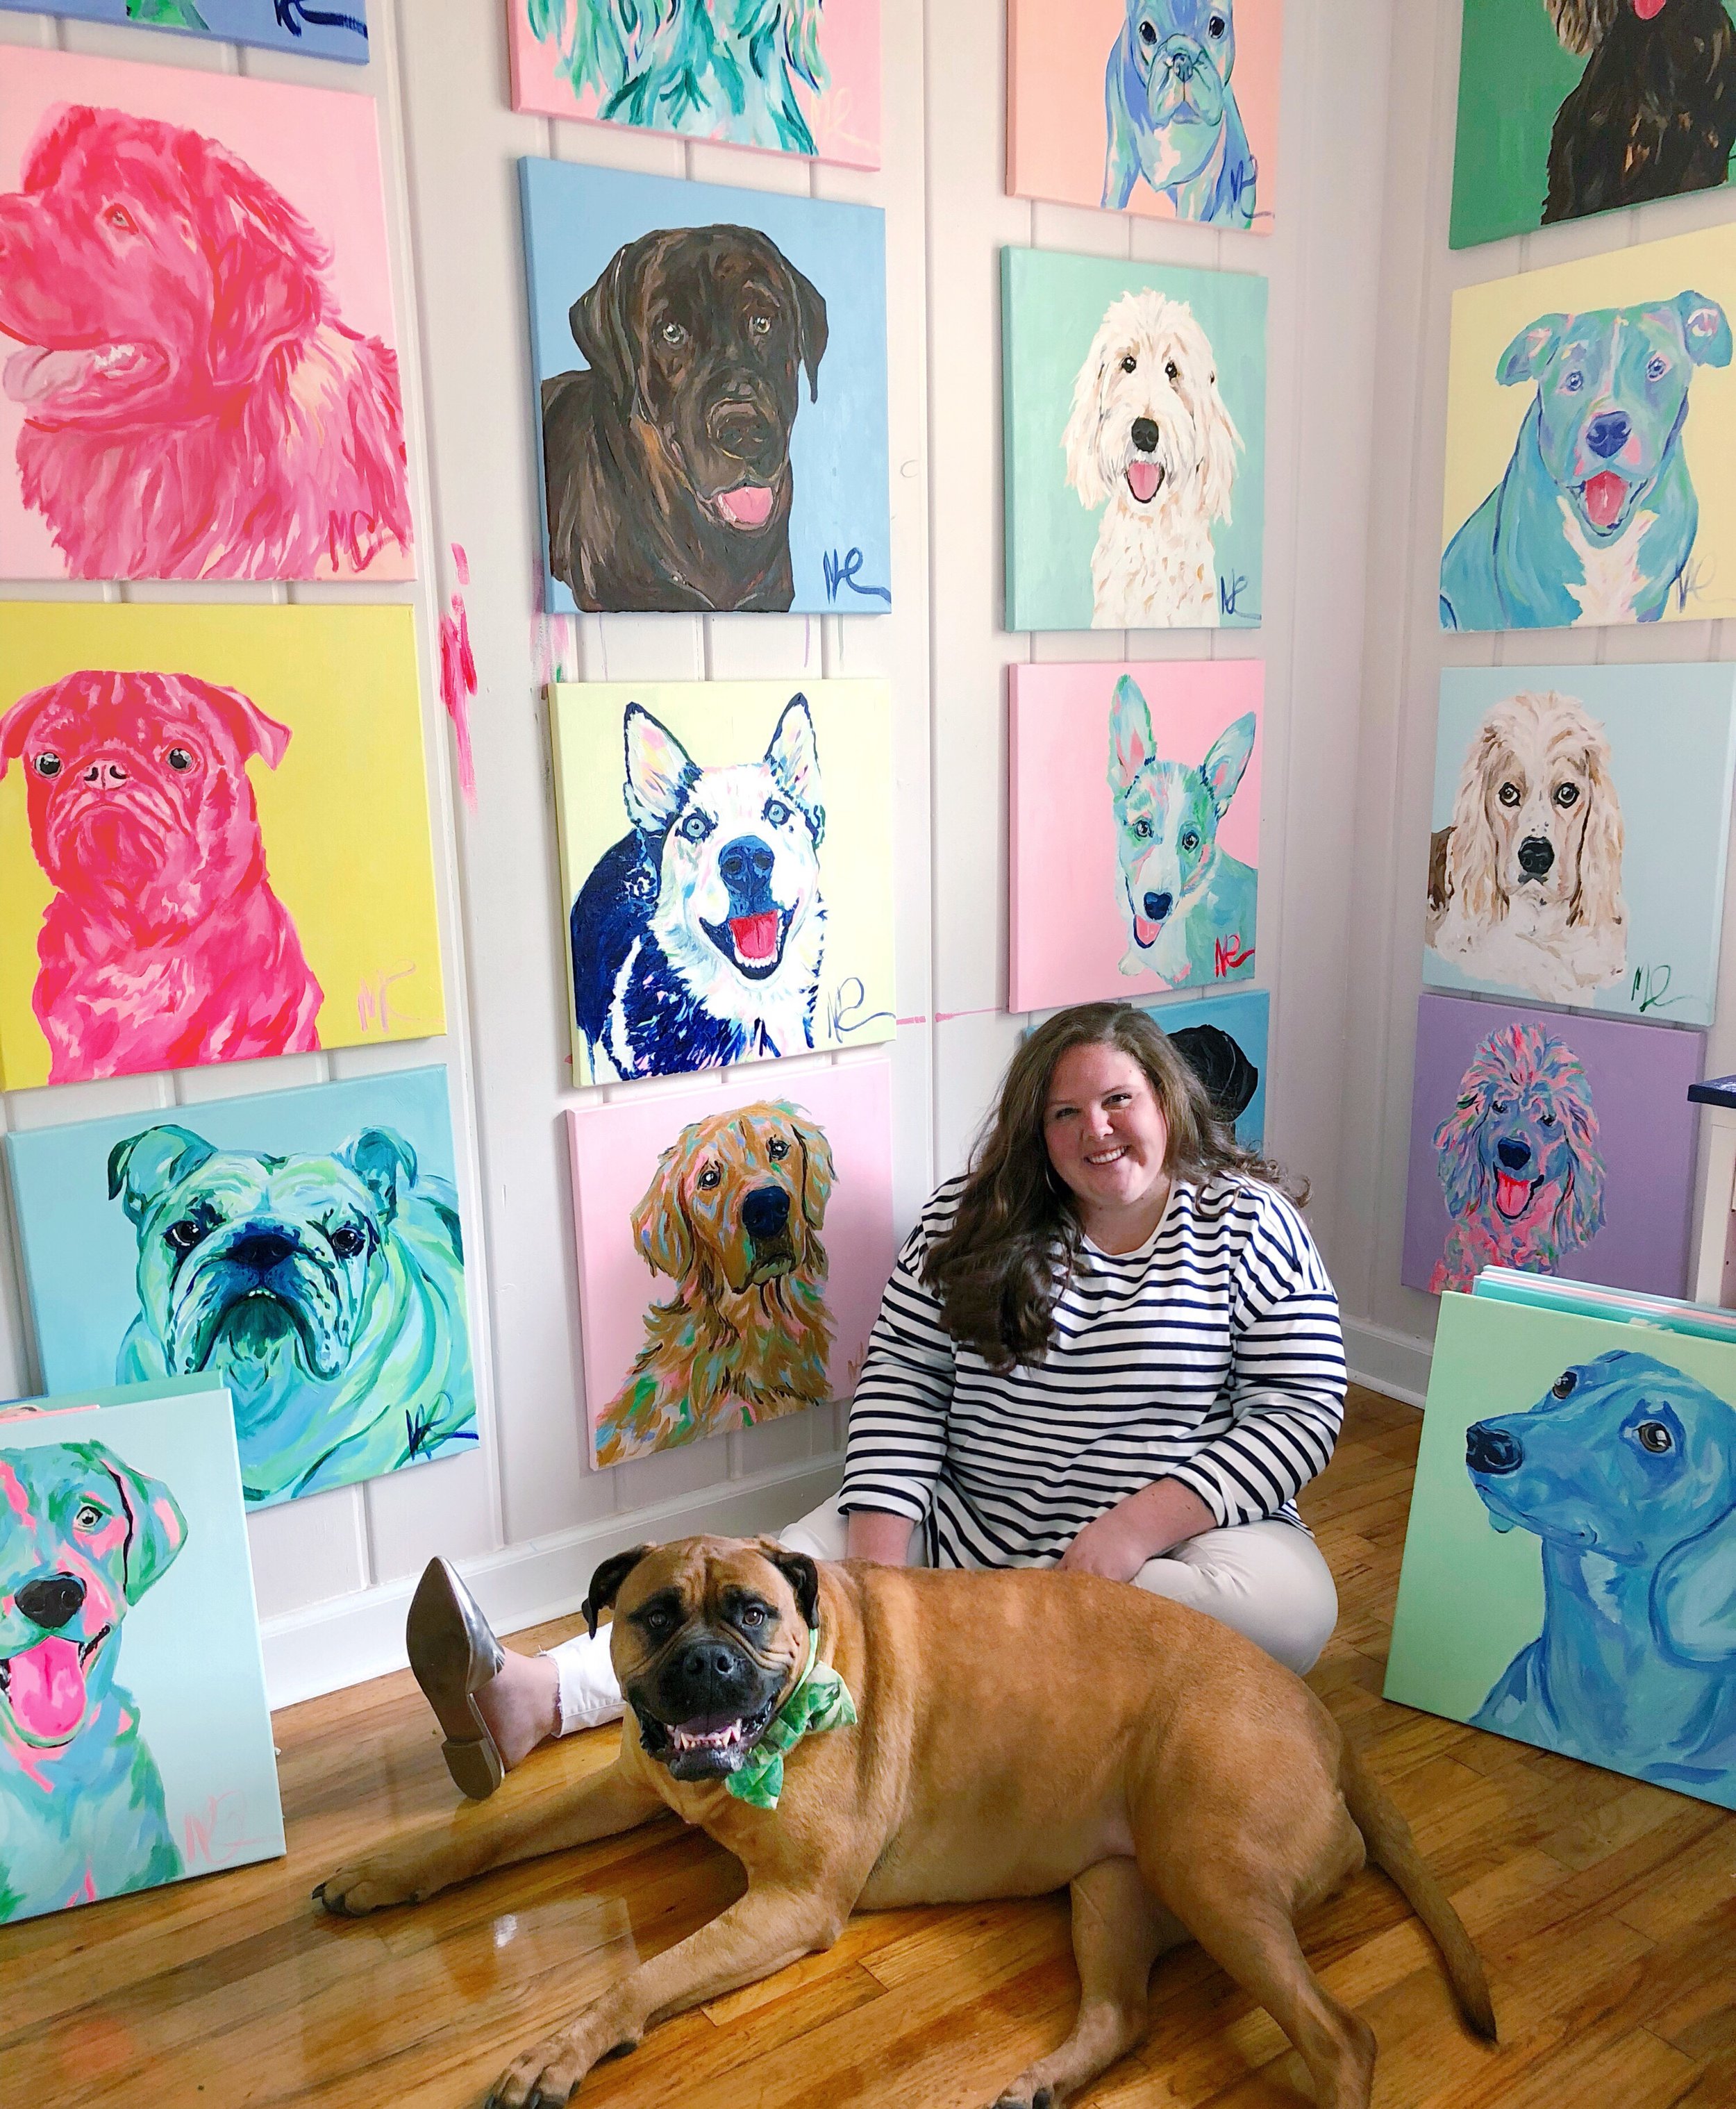
27 dogs. One July! (Pretend this post is happening before the series goes live, even though it’s three weeks after!)
This year was my second annual dog series, and I have to say, I love how it turned out. There are 27, 20x20” pieces that each have so much personality and pizazz. I can honestly say I’m really proud of them when I look at them all together!

Here are a few of my favorites:


Note: I said A FEW of my favorites. I did say I love them all.

Shop them here! And be sure to head to my instagram (@megancarn) to vote on which ones should be prints August 19, 20, and 21!

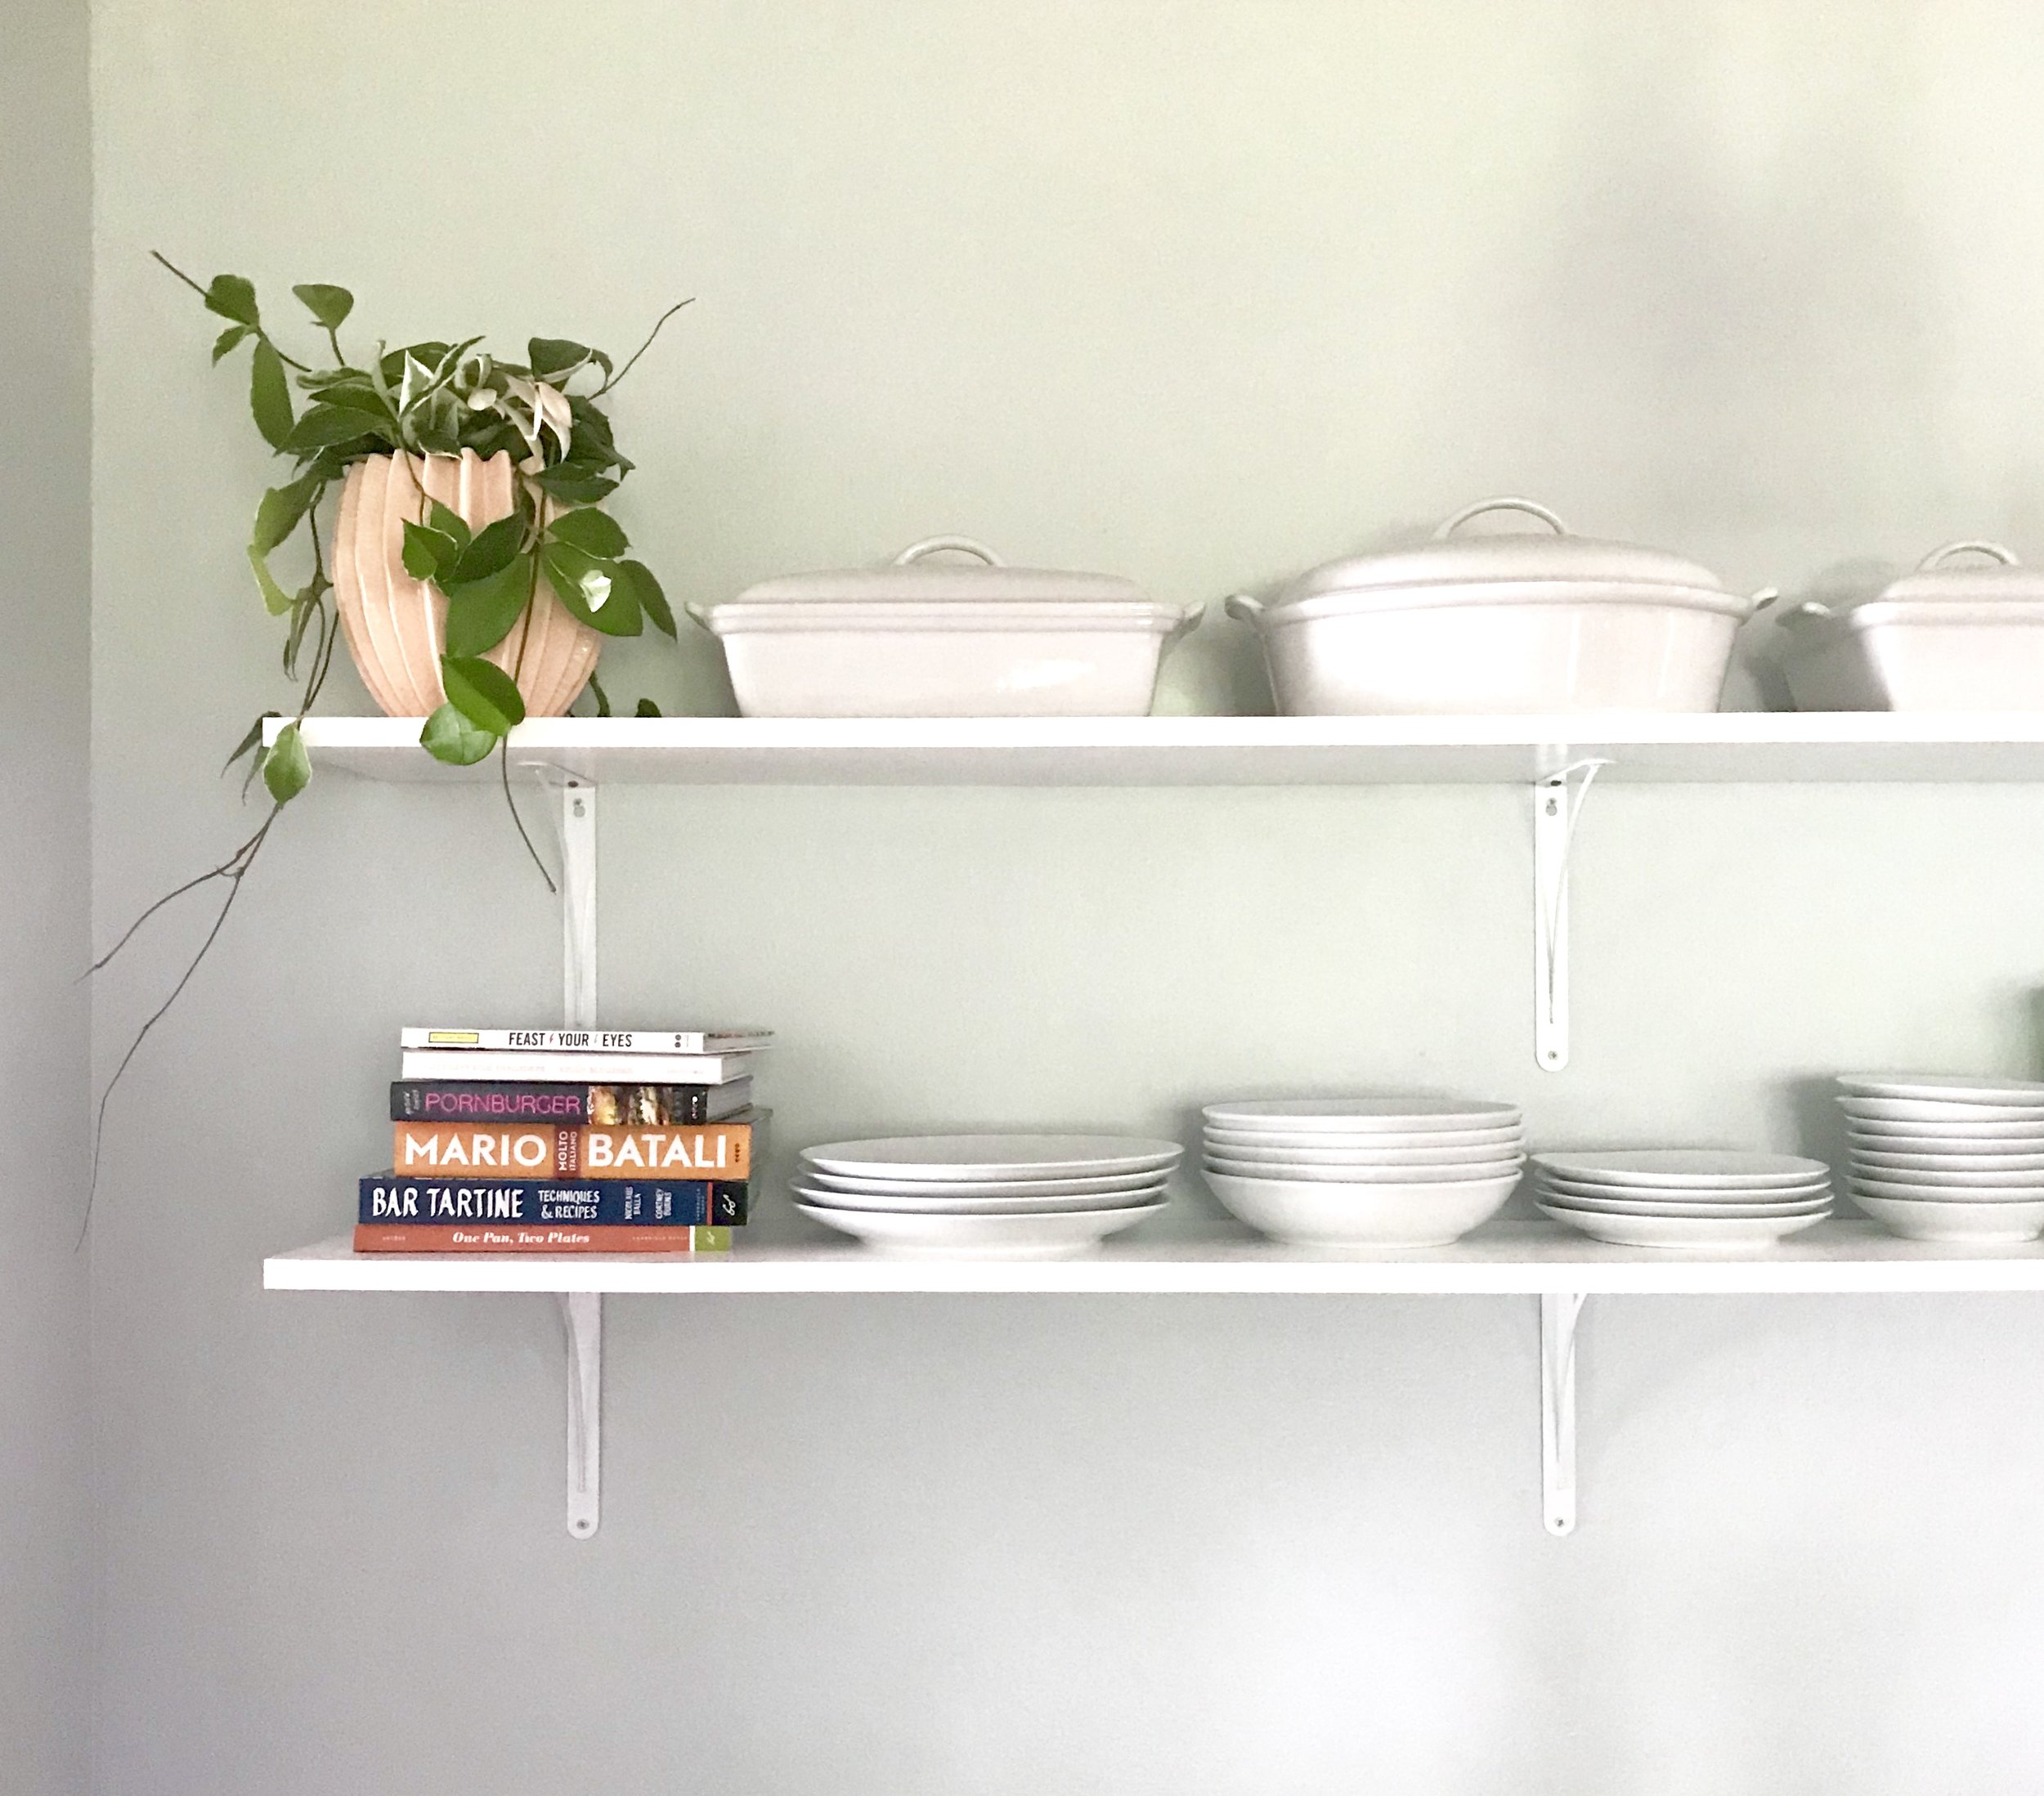
Let’s Get Fancy: DIY Open Shelving
HI!
Today is an exciting day, and it’s exciting because I have an excellent DIY project for you to try.
When we moved into our house, the kitchen was WORLDS better than both of our rentals before- there was a dishwasher, double the counterspace, and more cabinets! A friend helped me organize the kitchen goods from our wedding and our last home and it looked amazing. Then, we went to the grocery store and realized that whoops- we hadn’t left enough room for food storage! We left one upper cabinet, to be exact. But there wasn’t really anywhere for the other items to go either, and it was all stuff we used so it had to stay. So now you see the problem.
I’ve thought about options for the entire past year. Buy an island to replace the table: no, it wouldn’t look right. Put a credenza or buffet behind the table to store some items we use less: eh, there’s really not enough space for that. Go get more upper and lower cabinets to install on the wall: maybe, BUT the light is too close to where it would be and I would have to get outside help; also, I would need more countertop. (And around we went!)
Finally, it hit me. Open shelves. I love the look, and it would be great for our favorite stuff. Our pretty display kind-of-stuff. So I started hunting!
I found a couple of ready-to-buy options online from places like Pottery Barn and Amazon, but I wasn’t in love with any of them or the prices. (Or maybe I loved it but the price or size was not attractive!) I decided to go "custom" (DIY), and when my sister-in-law was in town last week, we finally pulled the trigger on this project!
I’m so happy with how it turned out. At best, I was hoping for a simple, fairly short term storage solution— the finished project looks like something I bought and it’s a piece I want to keep forever!
I went to Lowe’s for this project- it’s close to my house and my local one has some very nice people. I’m sure you can find similar materials in just about any Home Depot or locally owned hardware store, though!
Tools:
- Electric Drill
- Phillips head drill attachment
- drill bit set
- cabinet paint roller, paint tray
- quality paint brush
- hammer
- level
- measuring tape
- pencil
Supplies:
- fine grit sandpaper
- 6 shelf brackets (see notes)
- 2, 6’ wooden boards (see notes)
- white paint
What a list! Honestly, the hardest part for me was rounding up all of the tools in our house, and that’s the first step- 1. gather up your supplies. I would do this project inside- I did because I didn't want any bugs in the paint as it was drying. I made a space in my studio, but grab and use a dropcloth if paint can’t get on the floor in the room you're using. Next, find something to set your boards on as you paint them; I used an old chair and a plastic storage container.
2. Using your sandpaper, sand down any rough spots on your boards with the grain. (Note: Choose your boards carefully at the store and look for ones with the least imperfections, gouging, and splintering. They will look better at the end!) 3. After you’ve sanded, wipe the boards down with a damp cloth, and allow them to dry fully.
4. Next, paint the boards! We painted the edges and top first, allowed it to dry overnight, and then flipped it and painted the bottom. **be careful when painting the edges that you smooth any excess paint as it drips onto the bottom side- if it does drip, just sand down the excess dried paint, wipe, and allow to dry before applying the coat on the bottom!** Allow to dry again overnight, and voila! You’re ready. We did three coats on each side of this white paint.


Note: Technically, you can use the roller for this whole project, but the brush is great for catching drips.
5. While the paint is drying, go to your future shelf space and find the center point. Mark it. Next, choose how high you’d like your shelves to be, and how far apart you’d like them spaced; mark the line for the upper and lower shelf in the center you marked earlier. Use your level to mark for the shelves to keep you right in line with your center point! (We put 14.5 inches in between our shelves, and our lower one is just above eye level.)
6. After your shelves have dried completely, mark the center of the boards on the back bottom sides; we chose the back (wall side) and bottom of each shelf based on the look of the wood after painting, ensuring that the best parts were going to be most visible. After that mark is in place, measure 6 inches from the outer sides of the board, and mark those on the back (wall side) of the shelf, as well. These are the marks for your brackets!
7. Get your brackets and place them on your measured marks. Ensuring that they are straight and even with the backside of the board, mark where the screws need to go with a pencil. (We used a third board for this portion by holding it flush to the back of the shelf and brackets as we made our marks. If the bracket is not even with the back of the board, either the bracket or the board will not be flush to the wall.)
8. After the holes are marked, use a small drill bit (smaller than your screws) to drill a pilot hole. Then, screw your bracket in with the provided screws! ** note: my screws were actually a touch long for my shelf, so I had to be careful about how much I screwed in each screw. If you don’t want this added issue with the same brackets/board I used, pick up shorter screws in the fastener section!
9. Phew. Now that you’re finally ready, call a friend if you don't already have one there (2 extra people would be a huge help). Have one person or two people hold the shelf at your highest mark and place your level on the shelf. Level it, and step back and look at it to be sure you’re happy with the height- our original guess was way too high, so I am very glad we checked! Once you’ve confirmed, re-level and while your friend(s) holds it, mark the screw holes.
10. Tell your friends to be patient for a bit, because you’ve got some drilling to do! With the same small bit from the pilot holes on the shelving boards, drill pilot holes in the wall on top of your pencil marks. If there’s a stud behind the wall, yay! You don’t have to put in a wall anchor! If the drill goes straight through, you will have to put in a wall anchor.
11. Using a larger bit, redrill your holes until the wall anchor provided with your brackets can be gently hammered in. Anchors definitely help the screws stay in and the shelves fit better, but they can easily be mishapen or broken with too much force. You want it to be snug, but not too tight!
12. My brackets worked almost like a picture hanger, so next I screwed in the top screws and placed the holes over each one. Next, we tightened the screws and screwed in the bottom ones. Tighten the bottom, and watch out, because you have a new shelf on your hands.
13. Repeat for the next (or all of the next) shelves!

And finally, you are done. Hang them, style them, and enjoy having that much more space to use for storage! Now for some before and afters:
before:

Okay so: I’m obsessed with this Kate Waddell painting. I’ve moved it into the dining room! You’ll also find a long navy streak on the wall to the left; that was a painting accident from last year. Lastly, what a mess! Don’t worry. It’s still sort of a mess.

after:

Planter: Anthropologie | Recipe tin: Anthropologie | everything else: ask!

Feel free to ask any questions in the comments, or at hello@megancarn.com, and have fun shelving!
xx
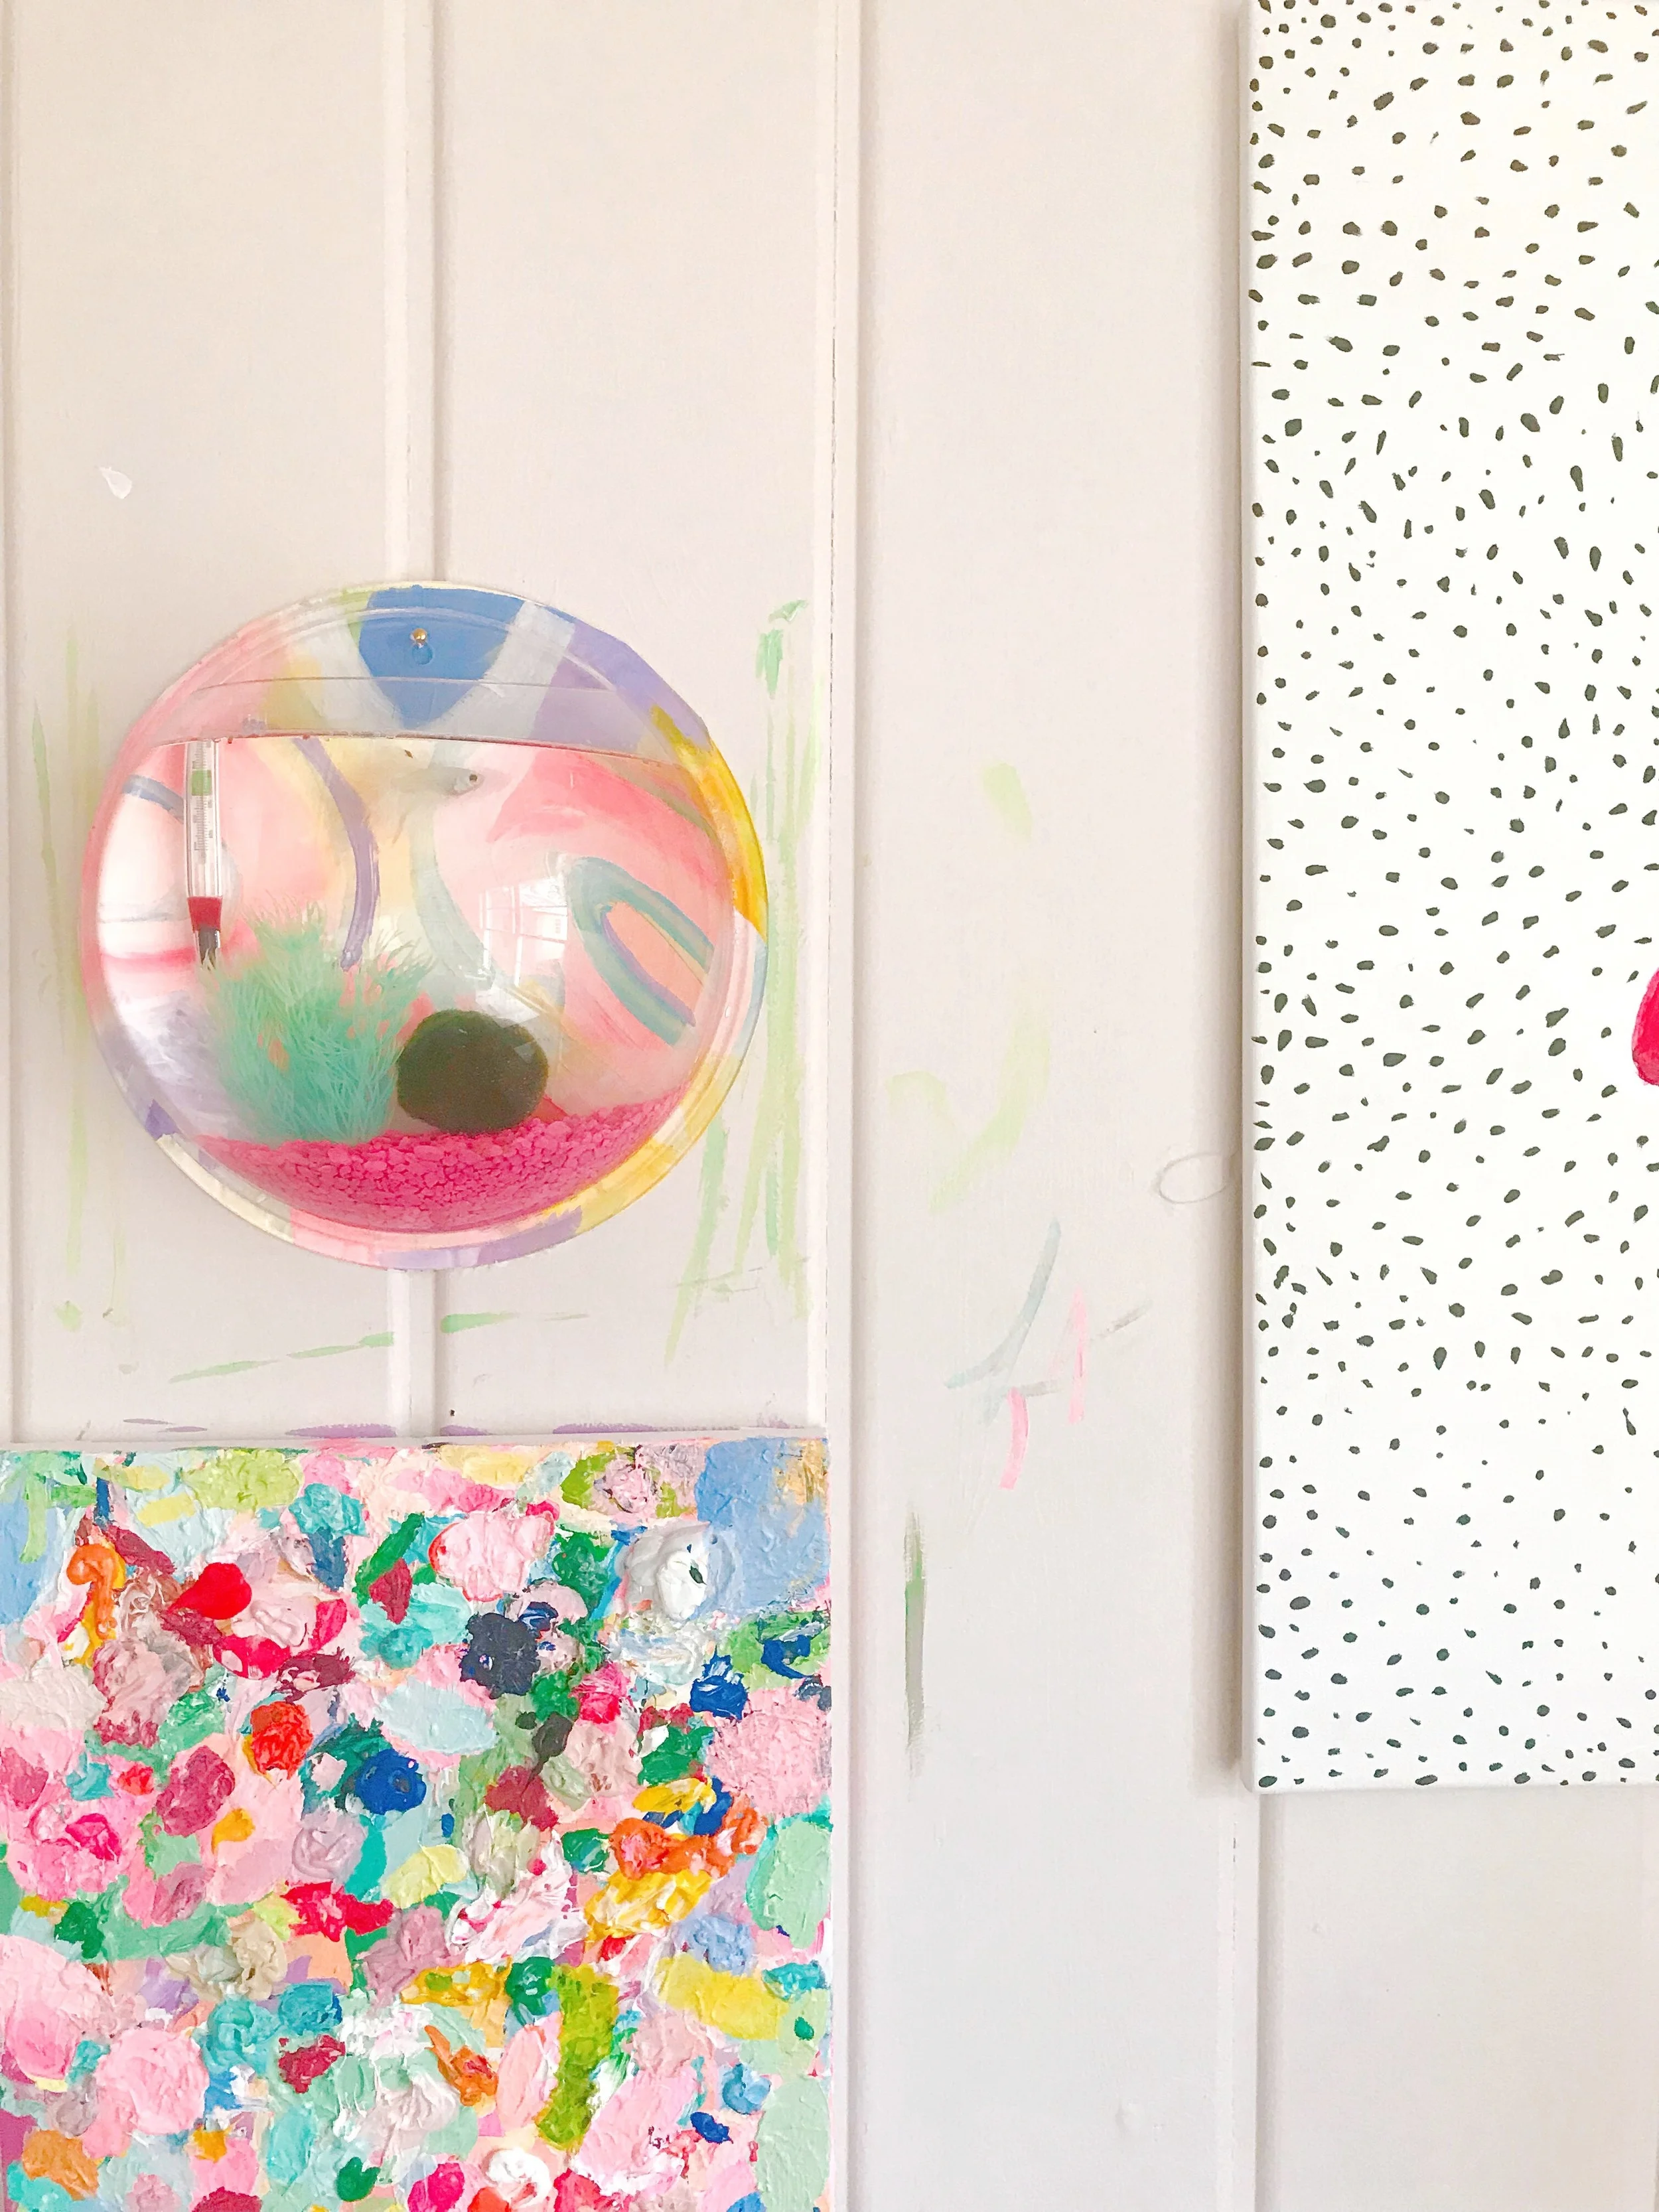
DIY WALL FISH TANK
Hello, hello!! And happy APRIL! I feel like I was just writing a life lately update, and that was over a month ago. But we're back, and today with what may be the best (and easiest) "DIY" of all time.
Preface/edit: PLEASE note that I am not a fish care expert and I am not posting this as a fish care expert. I've owned many fish in the past, and I personally sought advice from an experienced fish caretaker and my local pet store before moving forward with this project, and you should too! With any situation, do your own research and ask questions first. Also, I'd like to make it clear that I am monitoring Scotch very closely, as I am here every day, and all signs point to him being happy and healthy in his home. Should that change at any point, I will handle it promptly! Scotch is family!

Everyone, meet Scotch. (Scotch as in scotch bonnet, because he is spicy!) I've seen this style of tank a few times in the last few years, and after my recent studio cleanup and design, I decided to finally make it happen!
SUPPLIES:
- 11.2" wall-mount fish tank or larger
- 1, 18x24" piece of watercolor paper OR 12x12" watermelon printout (see below)
- paintbrush and acrylic paint
- scissors, pencil, craft knife
- screw or long nail
- coordinating tool- either a drill with matching bit or hammer
- tap water + water conditioner
- colored aquarium rocks
- tank prop- here's mine!
- fish tank thermometer
- 1 moss ball, 2 tank snails, and a betta fish, and fish food

I am so thrilled with this little project. It's so easy. Order your fish tank and supplies, and then go to your local pet store to pick up the living pieces- fish, moss ball, and snails. For our size of tank, it was recommended that we get one fish, one moss ball (a natural tank cleaner and filter), and two small snails (also a tank cleaner). I linked to a similar fish tank and my exact contents, but obviously you can make it a different color scheme! I got a half-moon betta because he was gorgeous and he had been there for awhile. I wanted to get him out of there!
When you get your tank, the back will have a brown paper sticker to protect it. Peel that off! (This step took me FOREVER. It was really on there.) After you have that paper off, lay it back down on the watercolor paper and trace around the tank and hanging hole with the pencil. Using the craft knife, go ahead and cut out the hole that matches up to the hanging hole on the tank.
At this point, get creative! Use your acrylic paint and brushes to make a little painting that will go behind your tank. You can use splatters, stripes, or try your hand at an abstract painting. I went with an abstract with some rainbows thrown in! I'm attaching a jpg below with one of my watermelon prints, if you'd like to skip this step and have it printed anywhere you print posters! (FedEx, Kinkos, Staples...you get it!)
If you paint it, allow your painting to dry overnight, and then cut it out.

My 18x24" paper + cut out circle for the tank. I made the mistake of not cutting my nail hole first, so I had to do it after!
Choose where you will hang your tank. It's gonna be heavy, so try to find an area with a stud! I have wood paneling, so this made this step very easy for me, and I was also able to use a long nail for mine. Using either your screw or nail (a screw is going to hold better), choose your spot and screw or hammer it in! Hang your tank art on it, and then hank your wall mounted tank over it and make sure it lines up.
Load your rocks, water, thermometer, and props in the tank! Use around 12-14* drops (*Read the back of your water conditioner carefully and calculate) and let the water condition for 24 hours. Acclimate your fish for a couple of hours in the room your tank is in, and then bombs away! Add him, the moss ball, and the snails to the party.
Done! You've got a crazy cool wall decoration! I've heard you can put a water plant in, but do check with your pet provider and make sure it's safe first!


Don't feel like painting? Heres an image you can print at home and collage or have printed at your local poster-printing store! You'll need a 12x12" printout. (***NOTE*** This image is for personal, private use. Please do not recreate, resell, or sell items with this image on it. With questions, reach out at hello@megancarn.com.)

Tag me if you decide to try it out! I'm excited to see everyone's fish tanks!!
xx