
Let’s Get Fancy: DIY Open Shelving
HI!
Today is an exciting day, and it’s exciting because I have an excellent DIY project for you to try.
When we moved into our house, the kitchen was WORLDS better than both of our rentals before- there was a dishwasher, double the counterspace, and more cabinets! A friend helped me organize the kitchen goods from our wedding and our last home and it looked amazing. Then, we went to the grocery store and realized that whoops- we hadn’t left enough room for food storage! We left one upper cabinet, to be exact. But there wasn’t really anywhere for the other items to go either, and it was all stuff we used so it had to stay. So now you see the problem.
I’ve thought about options for the entire past year. Buy an island to replace the table: no, it wouldn’t look right. Put a credenza or buffet behind the table to store some items we use less: eh, there’s really not enough space for that. Go get more upper and lower cabinets to install on the wall: maybe, BUT the light is too close to where it would be and I would have to get outside help; also, I would need more countertop. (And around we went!)
Finally, it hit me. Open shelves. I love the look, and it would be great for our favorite stuff. Our pretty display kind-of-stuff. So I started hunting!
I found a couple of ready-to-buy options online from places like Pottery Barn and Amazon, but I wasn’t in love with any of them or the prices. (Or maybe I loved it but the price or size was not attractive!) I decided to go "custom" (DIY), and when my sister-in-law was in town last week, we finally pulled the trigger on this project!
I’m so happy with how it turned out. At best, I was hoping for a simple, fairly short term storage solution— the finished project looks like something I bought and it’s a piece I want to keep forever!
I went to Lowe’s for this project- it’s close to my house and my local one has some very nice people. I’m sure you can find similar materials in just about any Home Depot or locally owned hardware store, though!
Tools:
- Electric Drill
- Phillips head drill attachment
- drill bit set
- cabinet paint roller, paint tray
- quality paint brush
- hammer
- level
- measuring tape
- pencil
Supplies:
- fine grit sandpaper
- 6 shelf brackets (see notes)
- 2, 6’ wooden boards (see notes)
- white paint
What a list! Honestly, the hardest part for me was rounding up all of the tools in our house, and that’s the first step- 1. gather up your supplies. I would do this project inside- I did because I didn't want any bugs in the paint as it was drying. I made a space in my studio, but grab and use a dropcloth if paint can’t get on the floor in the room you're using. Next, find something to set your boards on as you paint them; I used an old chair and a plastic storage container.
2. Using your sandpaper, sand down any rough spots on your boards with the grain. (Note: Choose your boards carefully at the store and look for ones with the least imperfections, gouging, and splintering. They will look better at the end!) 3. After you’ve sanded, wipe the boards down with a damp cloth, and allow them to dry fully.
4. Next, paint the boards! We painted the edges and top first, allowed it to dry overnight, and then flipped it and painted the bottom. **be careful when painting the edges that you smooth any excess paint as it drips onto the bottom side- if it does drip, just sand down the excess dried paint, wipe, and allow to dry before applying the coat on the bottom!** Allow to dry again overnight, and voila! You’re ready. We did three coats on each side of this white paint.


Note: Technically, you can use the roller for this whole project, but the brush is great for catching drips.
5. While the paint is drying, go to your future shelf space and find the center point. Mark it. Next, choose how high you’d like your shelves to be, and how far apart you’d like them spaced; mark the line for the upper and lower shelf in the center you marked earlier. Use your level to mark for the shelves to keep you right in line with your center point! (We put 14.5 inches in between our shelves, and our lower one is just above eye level.)
6. After your shelves have dried completely, mark the center of the boards on the back bottom sides; we chose the back (wall side) and bottom of each shelf based on the look of the wood after painting, ensuring that the best parts were going to be most visible. After that mark is in place, measure 6 inches from the outer sides of the board, and mark those on the back (wall side) of the shelf, as well. These are the marks for your brackets!
7. Get your brackets and place them on your measured marks. Ensuring that they are straight and even with the backside of the board, mark where the screws need to go with a pencil. (We used a third board for this portion by holding it flush to the back of the shelf and brackets as we made our marks. If the bracket is not even with the back of the board, either the bracket or the board will not be flush to the wall.)
8. After the holes are marked, use a small drill bit (smaller than your screws) to drill a pilot hole. Then, screw your bracket in with the provided screws! ** note: my screws were actually a touch long for my shelf, so I had to be careful about how much I screwed in each screw. If you don’t want this added issue with the same brackets/board I used, pick up shorter screws in the fastener section!
9. Phew. Now that you’re finally ready, call a friend if you don't already have one there (2 extra people would be a huge help). Have one person or two people hold the shelf at your highest mark and place your level on the shelf. Level it, and step back and look at it to be sure you’re happy with the height- our original guess was way too high, so I am very glad we checked! Once you’ve confirmed, re-level and while your friend(s) holds it, mark the screw holes.
10. Tell your friends to be patient for a bit, because you’ve got some drilling to do! With the same small bit from the pilot holes on the shelving boards, drill pilot holes in the wall on top of your pencil marks. If there’s a stud behind the wall, yay! You don’t have to put in a wall anchor! If the drill goes straight through, you will have to put in a wall anchor.
11. Using a larger bit, redrill your holes until the wall anchor provided with your brackets can be gently hammered in. Anchors definitely help the screws stay in and the shelves fit better, but they can easily be mishapen or broken with too much force. You want it to be snug, but not too tight!
12. My brackets worked almost like a picture hanger, so next I screwed in the top screws and placed the holes over each one. Next, we tightened the screws and screwed in the bottom ones. Tighten the bottom, and watch out, because you have a new shelf on your hands.
13. Repeat for the next (or all of the next) shelves!

And finally, you are done. Hang them, style them, and enjoy having that much more space to use for storage! Now for some before and afters:
before:

Okay so: I’m obsessed with this Kate Waddell painting. I’ve moved it into the dining room! You’ll also find a long navy streak on the wall to the left; that was a painting accident from last year. Lastly, what a mess! Don’t worry. It’s still sort of a mess.

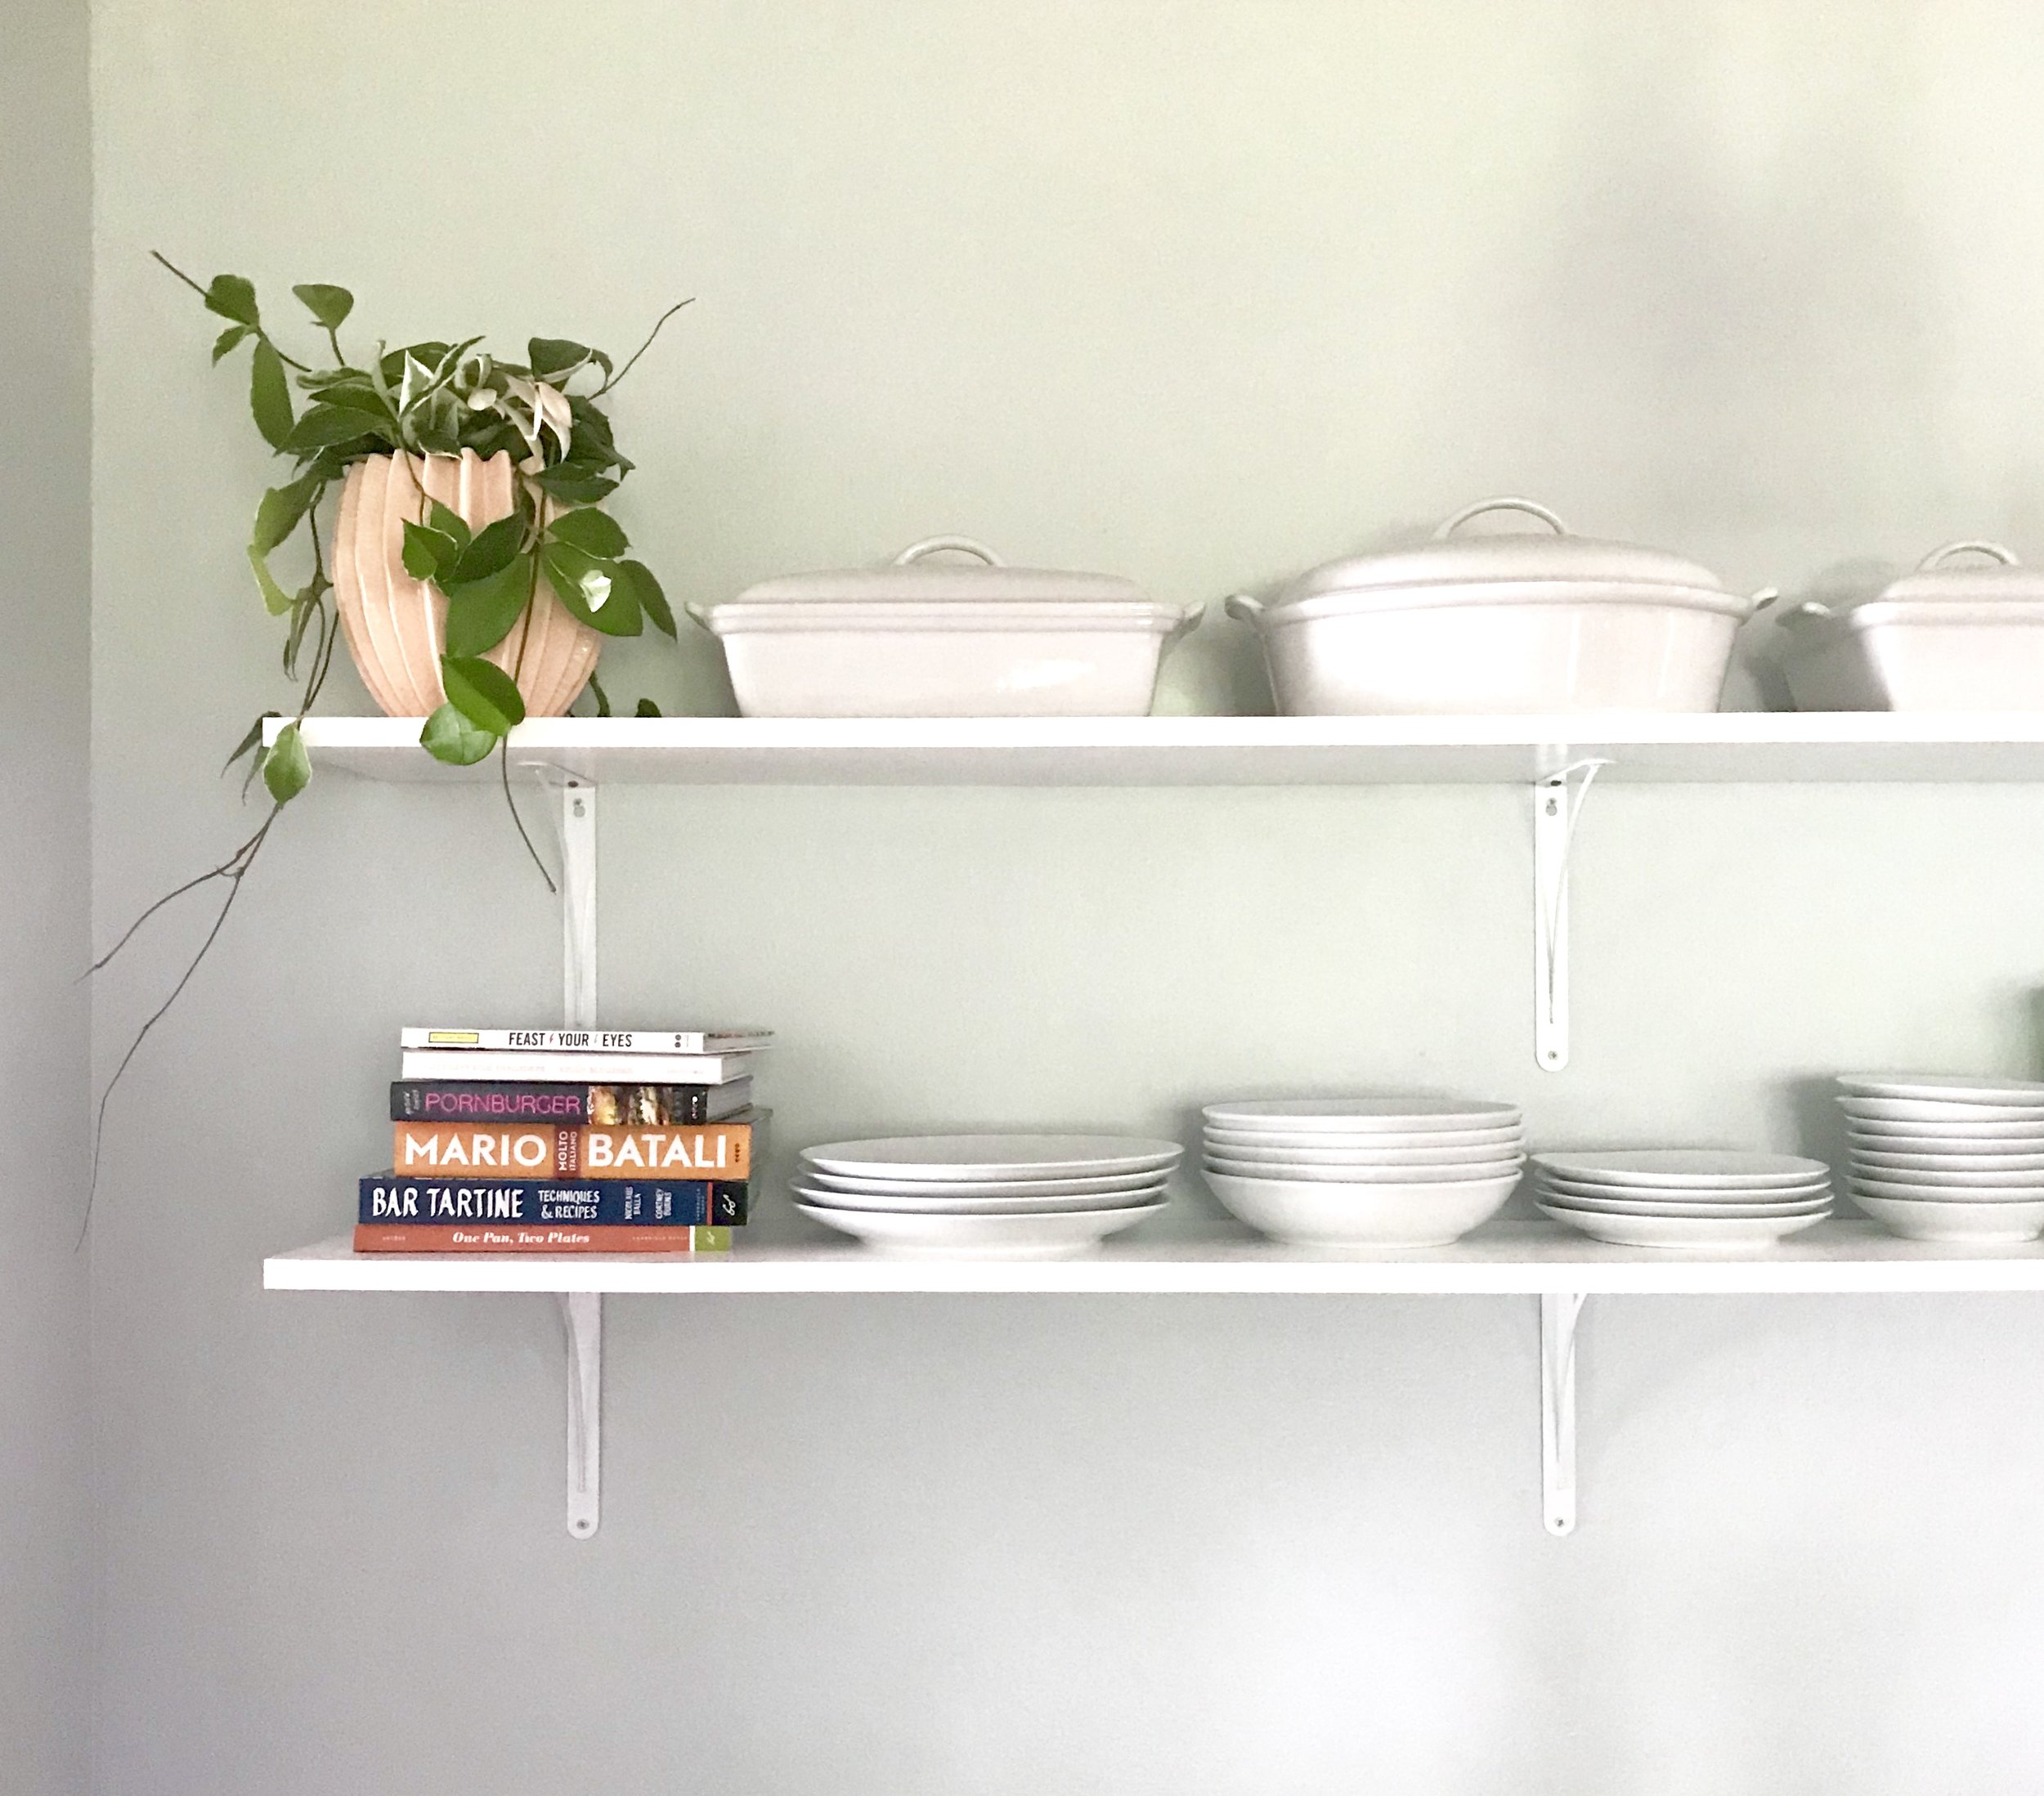
after:

Planter: Anthropologie | Recipe tin: Anthropologie | everything else: ask!

Feel free to ask any questions in the comments, or at hello@megancarn.com, and have fun shelving!
xx